Troubleshooting
How to Get Error Logs
Error logs are essential for troubleshooting issues and getting help from Jan team. To get error logs from Jan, follow the steps below:
Through Jan Interface
- Open System Monitor in the footer
- Choose App Log
Through Terminal
Application Logs (macOS)
tail -n 50 ~/Library/Application\ Support/Jan/data/logs/app.log
App, server, and engine messages are all written to the same logs/app.log file (look for the [APP] / [SERVER] / [SPECS] tags). Local model output from llama.cpp appears prefixed with [llamacpp-router] and [llamacpp-router stdout] — these lines are the best source when a model fails to load or crashes.
The logs/app.log file lives inside your Jan data folder:
- macOS:
~/Library/Application Support/Jan/data/logs/app.log - Windows:
%APPDATA%\Jan\data\logs\app.log - Linux:
~/.local/share/Jan/data/logs/app.log
Ensure to redact any private or sensitive information when sharing logs or error details. We retain your logs for only 24 hours.
Jan Won't Start or Crashes on Launch
If Jan fails to open, closes immediately, or hangs on a blank window:
1. Corrupt settings/store file
A damaged store.json in the data folder can prevent Jan from starting. Fully quit Jan, then rename or delete store.json (Jan regenerates it on next launch):
- macOS:
~/Library/Application Support/Jan/data/store.json - Windows:
%APPDATA%\Jan\data\store.json - Linux:
~/.local/share/Jan/data/store.json
This resets app preferences but keeps your models and chat history. If it still won't start, try a clean reinstall.
2. Another Jan instance is already running
Jan is single-instance — launching it again just focuses the existing window. If you see no window at all, check for a stale process (system tray icon, or ps aux | grep -i jan / Task Manager) and quit it before relaunching.
3. Port 1337 already in use
Jan's Local API Server binds to 127.0.0.1:1337 and does not fall back to another port automatically. If that port is taken (often by a previous Jan process that didn't exit cleanly), the server fails to bind. See Port Conflicts below to find and free the port, or change it in Settings > Local API Server.
Broken Build
To resolve the issue where Jan is stuck in a broken build after installation:
-
Uninstall Jan
-
Delete Application Data, Cache, and User Data:
rm -rf ~/Library/Application\ Support/Jan
- Download the latest version of Jan
Following these steps, you can cleanly uninstall and reinstall Jan, ensuring a smooth and error-free experience with the latest version.
Before reinstalling Jan, ensure it's completely removed from all shared spaces if installed on multiple user accounts on your device.
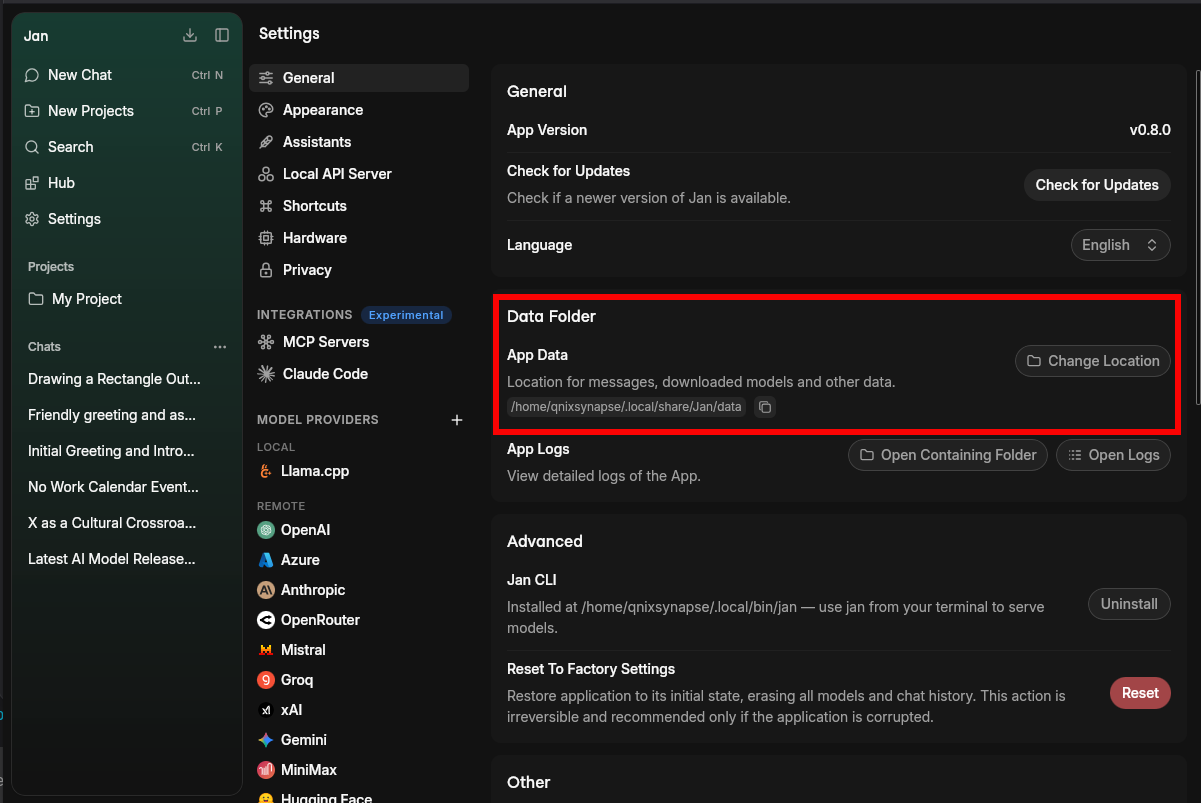
Cannot Relocate Data Folder on Windows
If you are unable to change the data folder location through Jan's interface on Windows, you can manually update it by editing the settings file:
-
Fully quit Jan (right-click the system tray icon → Quit)
-
Open File Explorer and navigate to:
C:\Users\[username]\AppData\Roaming\Jan\ -
Open
settings.jsonwith a text editor (e.g. Notepad) -
Find the
"data_folder"field and update its value to your desired path, for example:{"data_folder": "D:\\Jan"} -
Optionally, copy your data from the old folder to the new folder to preserve your models, chat history, and settings
-
Save the file and restart Jan
Jan will now use the new data folder location.
Use double backslashes (\\) for path separators in the JSON file, e.g. "D:\\Jan\\data".
Troubleshooting NVIDIA GPU
To resolve issues when Jan does not utilize the NVIDIA GPU on Windows and Linux systems.
Step 1: Verify Hardware and System Requirements
1.1. Check GPU Detection
First, verify that your system recognizes the NVIDIA GPU: Windows:
- Right-click desktop → NVIDIA Control Panel
- Or check Device Manager → Display Adapters Linux:
lspci | grep -i nvidia
1.2. Install Required components
NVIDIA Driver:
- Install NVIDIA Driver (opens in a new tab) for your GPU (NVIDIA driver 470.63.01 or higher).
- Verify installation:
nvidia-smi
Expected output should show your GPU model and driver version.
CUDA Toolkit:
- Download and install CUDA toolkit (opens in a new tab) (CUDA 11.7 or higher)
- Verify installation:
nvcc --version
Linux Additional Requirements:
- Required packages are installed:
sudo apt updatesudo apt install gcc-11 g++-11 cpp-11
See detailed instructions (opens in a new tab).
- Set up CUDA environment:
export LD_LIBRARY_PATH=$LD_LIBRARY_PATH:/usr/local/cuda/lib64
See detailed instructions (opens in a new tab).
Ensure your (V)RAM is accessible; some users with virtual RAM may require additional configuration.
Step 2: Turn on GPU acceleration
Jan manages GPU usage automatically:
- Switches to GPU mode when supported
- Automatically selects GPU with highest VRAM
To verify GPU acceleration is turned on:
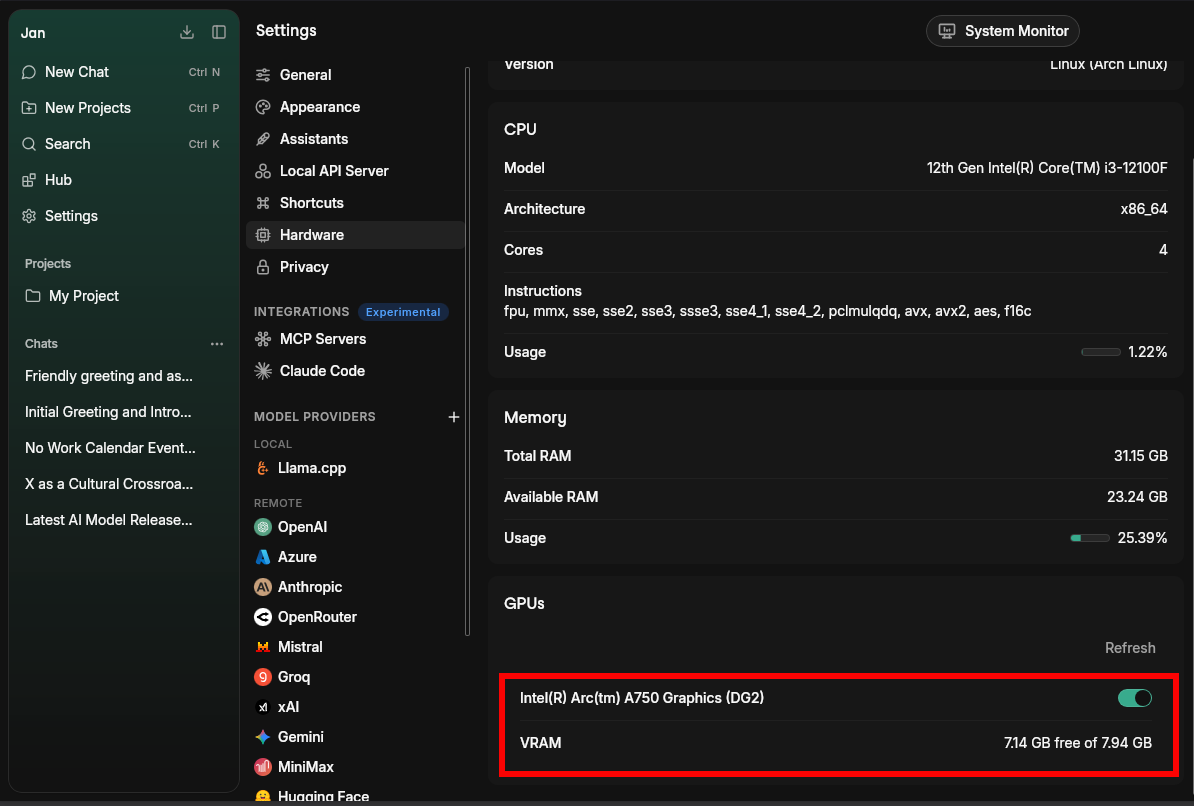
- Open Settings > Hardware
- Verify that GPU Acceleration is turned on
- Verify your selected GPU(s) are visible in System Monitor from Jan's footer
Step 3: Restart Jan
Restart Jan to make sure it works.
Tested Configurations
These configurations have been verified to work with Jan's GPU acceleration. You can use them as reference points for your setup.
Bare Metal Installations
Windows 11 Pro (64-bit)
| Component | Version/Model |
|---|---|
| GPU | NVIDIA GeForce RTX 4070Ti |
| CUDA | 12.2 |
| NVIDIA Driver | 531.18 |
| OS | Windows 11 Pro 64-bit |
| RAM | 32GB |
Ubuntu 22.04 LTS
| Component | Version/Model |
|---|---|
| GPU | NVIDIA GeForce RTX 4070Ti |
| CUDA | 12.2 |
| NVIDIA Driver | 545 |
| OS | Ubuntu 22.04 LTS |
Virtual Machine Setups
Ubuntu on Proxmox VM
| Component | Version/Model |
|---|---|
| GPU | NVIDIA GeForce GTX 1660Ti |
| CUDA | 12.1 |
| NVIDIA Driver | 535 |
| OS | Ubuntu 20.04/18.04 LTS |
| VM Type | Proxmox |
Performance Notes
- Bare metal installations provide better performance
- VM setups require proper GPU passthrough configuration
- Some laptop GPUs may have reduced performance
- Hybrid graphics (Optimus) may need additional configuration
AMD and Apple GPUs
Jan isn't limited to NVIDIA. It detects your hardware and picks a backend automatically, but a GPU backend is only preferred when a GPU reports at least 6 GB of VRAM — below that, Jan runs on CPU.
AMD / Intel (Vulkan):
- Requires up-to-date GPU drivers with Vulkan support.
- If you see a
ggml_vulkan ... errorin the logs, update your drivers and confirm Vulkan is installed (vulkaninfoon Linux). - Select the Vulkan backend under Settings > Model Providers > Llama.cpp > Backend.
Apple Silicon (Metal):
- Metal acceleration is used automatically on M-series Macs; no setup needed.
- A
ggml_metal ... errorusually means the model is too large for available unified memory — use a smaller or more heavily quantized model.
CPU requirement (all platforms):
- llama.cpp builds require AVX2. On very old CPUs without AVX2, pick a
noavx/CPU-compatible backend build; otherwise the model process will fail to start.
GPU not detected after sleep (Linux):
- After suspend/resume the driver state can go stale and Jan may report "No GPU detected." Restart Jan to re-probe the hardware.
Model Won't Load or Crashes (llama.cpp)
When a local model fails to load or crashes mid-generation, Jan surfaces the error in the chat (as a model error banner) and writes the underlying cause to the logs. The most common causes:
Out of memory (RAM or VRAM)
- Symptom: The model fails to load, or generation stops with an out-of-memory error.
- Cause: The model + context needs more memory than is available.
- Fix: Use a smaller or more quantized model; reduce the context size; offload fewer layers to
the GPU (lower
ngl); or switch to the CPU backend.
Out of context size
- Symptom: A banner says the model ran out of context size.
- Cause: The conversation (prompt) is longer than the model's configured context window.
- Fix: Click Increase Context Size in the banner, or raise Context Size in the model
settings (default
8192, up to131072). Larger context uses more memory.
Model architecture not supported
- Symptom: "The model's architecture is not supported by this version of the backend."
- Cause: The backend build is older than the model, or the file isn't a supported text model.
- Fix: Update the llama.cpp backend (Settings > Model Providers > Llama.cpp > Backend), or use a different model.
Model load timed out
- Symptom: "Router took too long to start and timed out."
- Cause: A large model on a slow disk didn't finish loading within the timeout (default 600s).
- Fix: Wait and retry, use a smaller model, or store models on faster storage.
Backend / driver error
- Symptom: "The model process encountered an unexpected error," or a
cuda error:/ggml_vulkan/ggml_metalline in the logs. - Cause: GPU driver/runtime problem or an unsupported operation on the selected backend.
- Fix: Update drivers, or switch backends (CPU / Vulkan / CUDA). Check the logs for the exact line.
Common llama.cpp error messages
These strings appear in logs/app.log (prefixed [llamacpp-router]) when a model fails:
| Log message | Likely cause | Resolution |
|---|---|---|
unknown model architecture: '<arch>' | Backend too old, or not a supported text model | Update the backend; confirm the model is supported |
error loading model / failed to load model | Corrupt or truncated GGUF, or partial download | Re-download the model |
missing tensor / wrong number of tensors | Incomplete or mismatched GGUF | Re-download from a known-good source, or try another quantization |
failed to allocate ... buffer / out of memory / cudaMalloc | Not enough RAM/VRAM for the model or KV cache | Smaller model, lower context, fewer GPU layers |
request (N tokens) exceeds the available context size (M) | Prompt longer than the context window | Increase context size or shorten the conversation |
GGML_ASSERT(...) | Backend bug or unsupported op on this backend | Try a different backend; report upstream if it persists |
For multi-shard (split) GGUF models, point the model file at shard 1 (the standard llama.cpp convention) so the rest are picked up automatically.
Cloud Provider and Network Errors
Errors from cloud providers and custom endpoints surface as a chat error with the HTTP status:
| Status | Meaning | Fix |
|---|---|---|
401 Unauthorized | API key is missing, wrong, or revoked | Re-check the key; confirm the right provider is selected |
403 Forbidden | Key lacks access to that model/endpoint | Verify the key's permissions and the model ID |
429 Rate limited | Too many requests, or out of quota/credits | Wait and retry; add fallback keys; check your billing |
If you've configured API key fallbacks and see "key rotation exhausted," every configured key failed with 401/403 — they're all invalid or unauthorized.
Custom endpoint won't connect:
- Wrong API type (OpenAI- vs Anthropic-Compatible) makes requests fail even with a valid key.
- A
404on every request usually means the base URL is missing/v1(or the wrong path). - "Connection refused" / network errors mean the server isn't running or isn't reachable.
See the Custom Endpoints guide for details.
Permission Denied
When running Jan, you might encounter the following error message:
Uncaught (in promise) Error: Error invoking remote method 'installExtension':Error Package /Applications/Jan.app/Contents/Resources/app.asar.unpacked/pre-install/janhq-assistant-extension-1.0.0.tgz does not contain a valid manifest:Error EACCES: permission denied, mkdtemp '/Users/username/.npm/_cacache/tmp/ueCMn4'
Permission problems mainly cause this error during installation. To resolve this issue, follow these steps:
-
Open your Terminal
-
Execute the following command to change ownership of the
~/.npmdirectory to the current user:
sudo chown -R $(whoami) ~/.npm
This command ensures that the necessary permissions are granted for Jan's installation.
"Failed to fetch" or "Something's Amiss" errors
When you start a chat with a model and encounter a Failed to Fetch or Something's Amiss error, here are some possible solutions to resolve it:
1. Check System & Hardware Requirements
- Hardware dependencies: Ensure your device meets all hardware requirements
- OS: Ensure your operating system meets the minimum requirements (Mac (opens in a new tab), Windows, Linux (opens in a new tab)
- RAM: Choose models that use less than 80% of your available RAM
- For 8GB systems: Use models under 6GB
- For 16GB systems: Use models under 13GB
2. Check Model Parameters
- In Engine Settings in right sidebar, check your
ngl(number of GPU layers) setting to see if it's too high - Start with a lower NGL value and increase gradually based on your GPU memory
3. Port Conflicts
If you check your app logs & see "Address already in use" or a bind failure on 127.0.0.1:1337 (Jan's default Local API Server port), check port availability:
# Macnetstat -an | grep 1337# Windowsnetstat -ano | find "1337"tasklist /fi "PID eq 1337"# Linuxnetstat -anpe | grep "1337"
If port 1337 is occupied, change it under Settings > Local API Server > Configuration > Server Port.
Netstat displays the contents of various network-related data structures for active connections.
Default Jan ports:
- Jan Local API Server:
1337 - Jan Documentation:
3001
4. Factory Reset
A factory reset can resolve persistent issues by returning Jan to its original state. This will remove all custom settings, downloaded models, and chat history.
- Go to Settings > General
- At Reset To Factory Settings, click Reset
This will delete all chat history, models, and settings.
5. Try a clean installation
- Uninstall Jan & clean Jan data folders (Mac, Windows, Linux)
- Install the latest stable release
This will delete all your Jan data.
OpenAI Unexpected Token Issue
The "Unexpected token" error usually relates to OpenAI API authentication or regional restrictions.
Step 1: API Key Sepup
- Get a valid API key from OpenAI's developer platform (opens in a new tab)
- Ensure the key has sufficient credits & appropriate permissions
Step 2: Regional Access
- If you're in a region with restricted access, use a VPN service from a supported region
- Verify your network can reach OpenAI's API endpoints
Performance Issues
Models Running Slowly:
- Enable GPU acceleration (see NVIDIA section above)
- Use appropriate model size for your hardware
- Close other memory-intensive applications
- Check Task Manager/Activity Monitor for resource usage
High Memory Usage:
- Switch to smaller model variants
- Reduce context length in model settings
- Enable model offloading in engine settings
Frequent Crashes:
- Update graphics drivers
- Check system temperature
- Reduce GPU layers if using GPU acceleration
- Verify adequate power supply (desktop systems)
Jan CLI
Windows: running jan opens the Jan application window
If typing jan in a terminal opens the Jan desktop app instead of the CLI, your system is resolving the jan command to the app launcher rather than the CLI binary.
To fix this, add the CLI binary directory to your Path environment variable:
- Open System Properties → Advanced → Environment Variables
- Under System variables (or User variables), select Path and click Edit
- Click New and add:
ReplaceC:\Users\<username>\AppData\Local\Programs\Jan\resources\bin
<username>with your Windows username. - Click OK to save, then open a new terminal window and try
janagain. The CLI binary is installed asjan.exeinside that directory.
Need Further Support?
If these solutions don't work:
- Gather Information: Copy your error logs and note your system specs
- Get Community Support: Join our Discord (opens in a new tab) and post in #🆘|jan-help with your logs and system info
Remove personal information before sharing logs. We only keep logs for 24 hours, so report issues promptly.