Model Management
This guide shows you how to add, customize, and delete models within Jan.
Local Model
Local models are managed through Llama.cpp (opens in a new tab), and these models are in a format called GGUF. When you run them locally, they will use your computer's memory (RAM) and processing power, so please make sure that you download models that match the hardware specifications for your operating system:
Adding Models
1. Download from Jan Hub (Recommended)
The easiest way to get started is using Jan's built-in model hub (which is connected to HuggingFace's Model Hub (opens in a new tab):
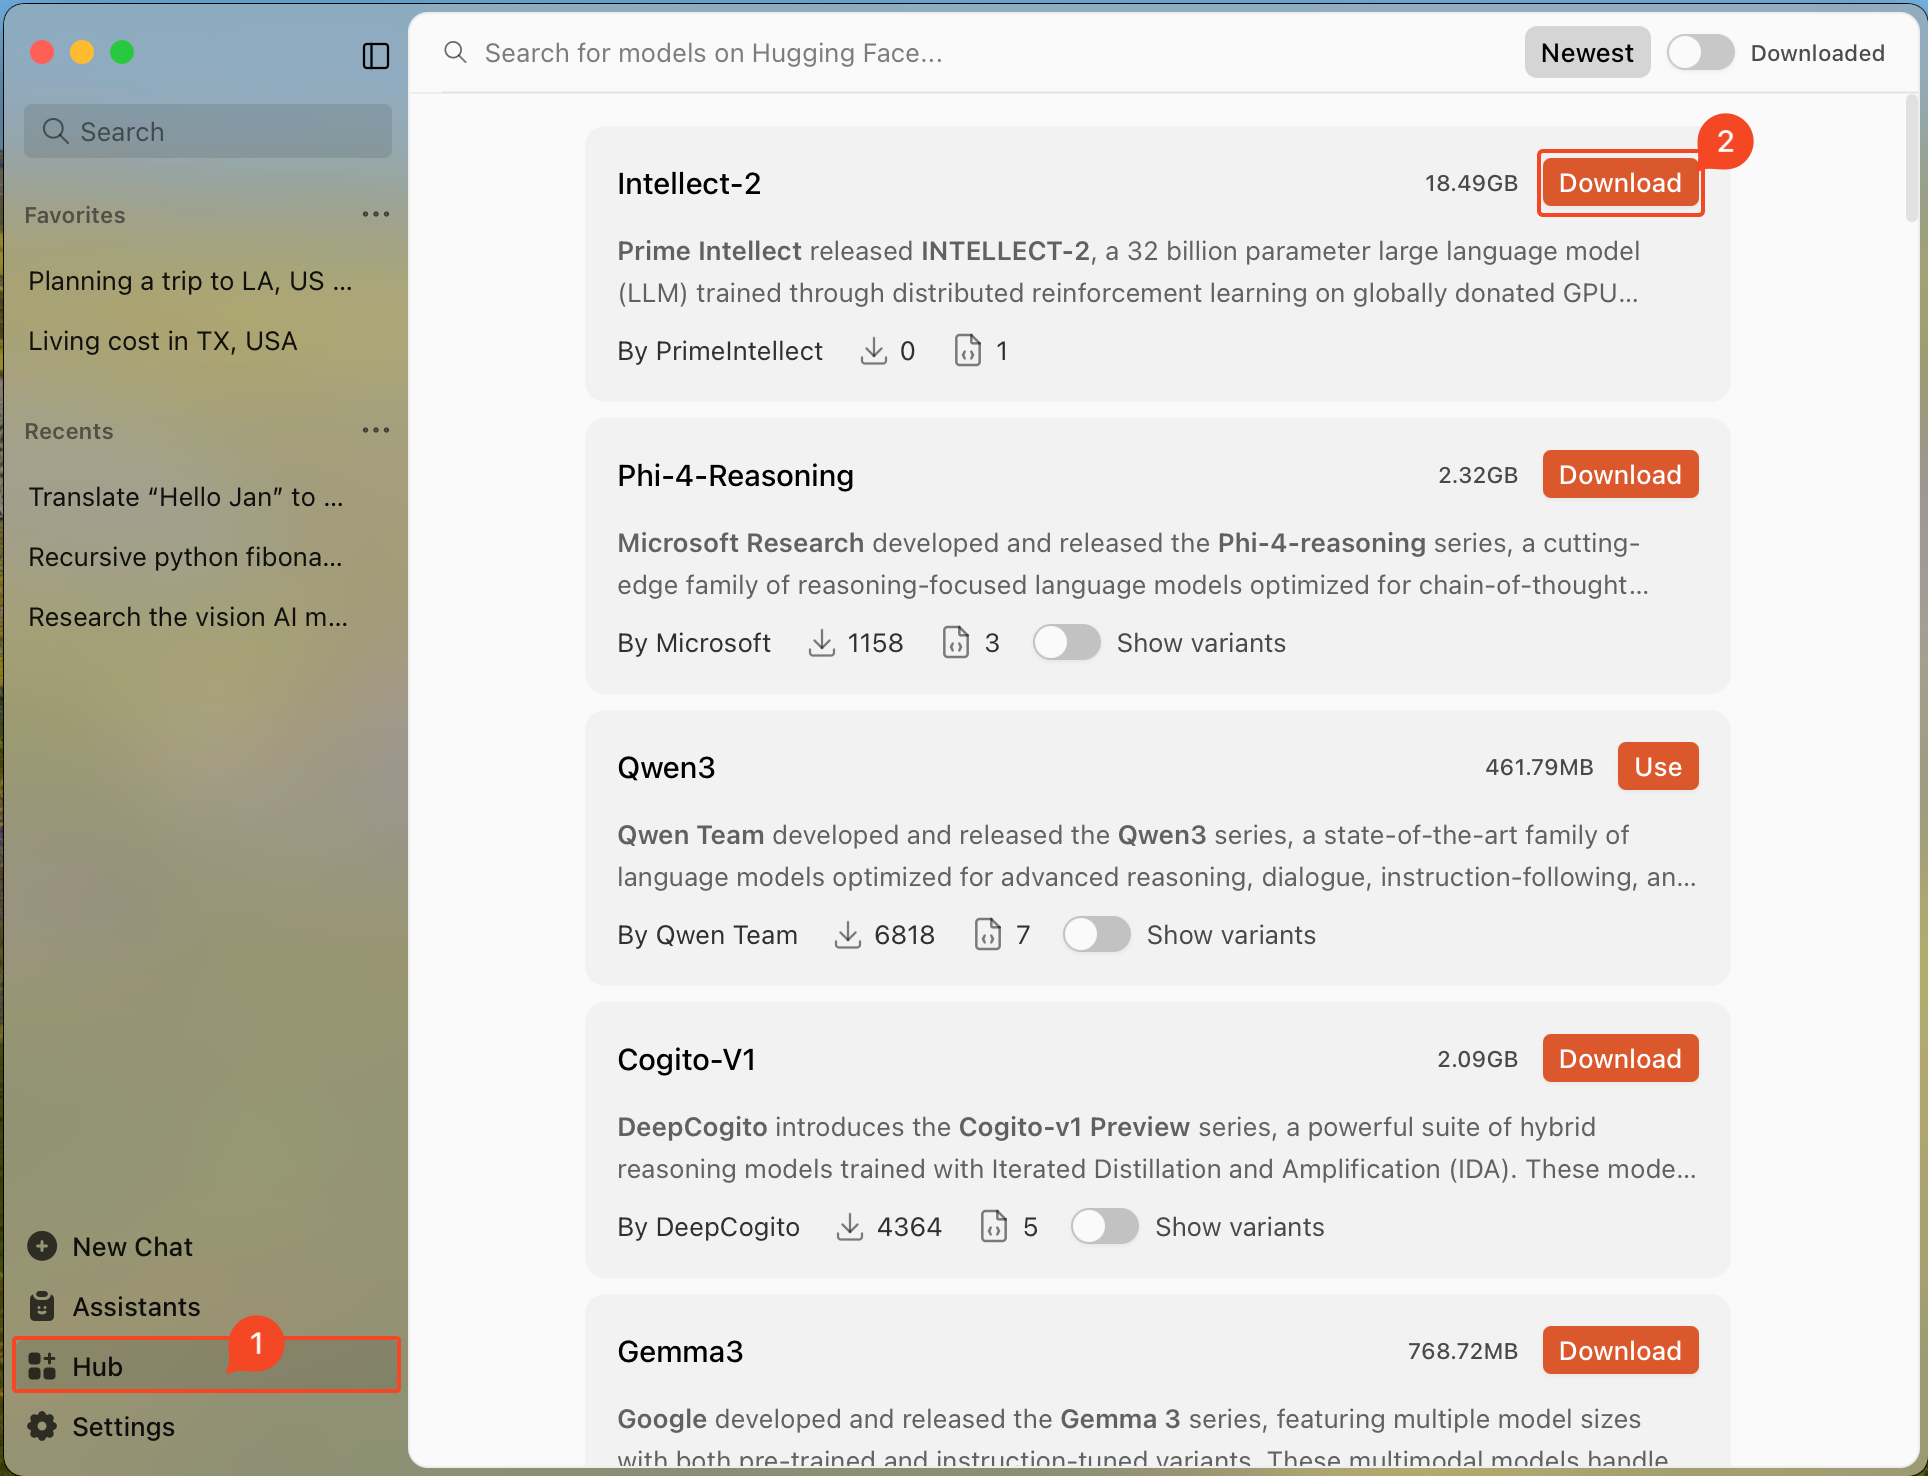
- Go to the Hub tab
- Browse available models and click on any model to see details about it
- Choose a model that fits your needs & hardware specifications
- Click Download on your chosen model
Jan will indicate if a model might be Slow on your device or Not enough RAM based on your system specifications.
2. Import from Hugging Face (opens in a new tab)
You can download models with a direct link from Hugging Face:
Note: Some models require a Hugging Face Access Token. Enter your token in Settings > Model Providers > Hugging Face before importing.
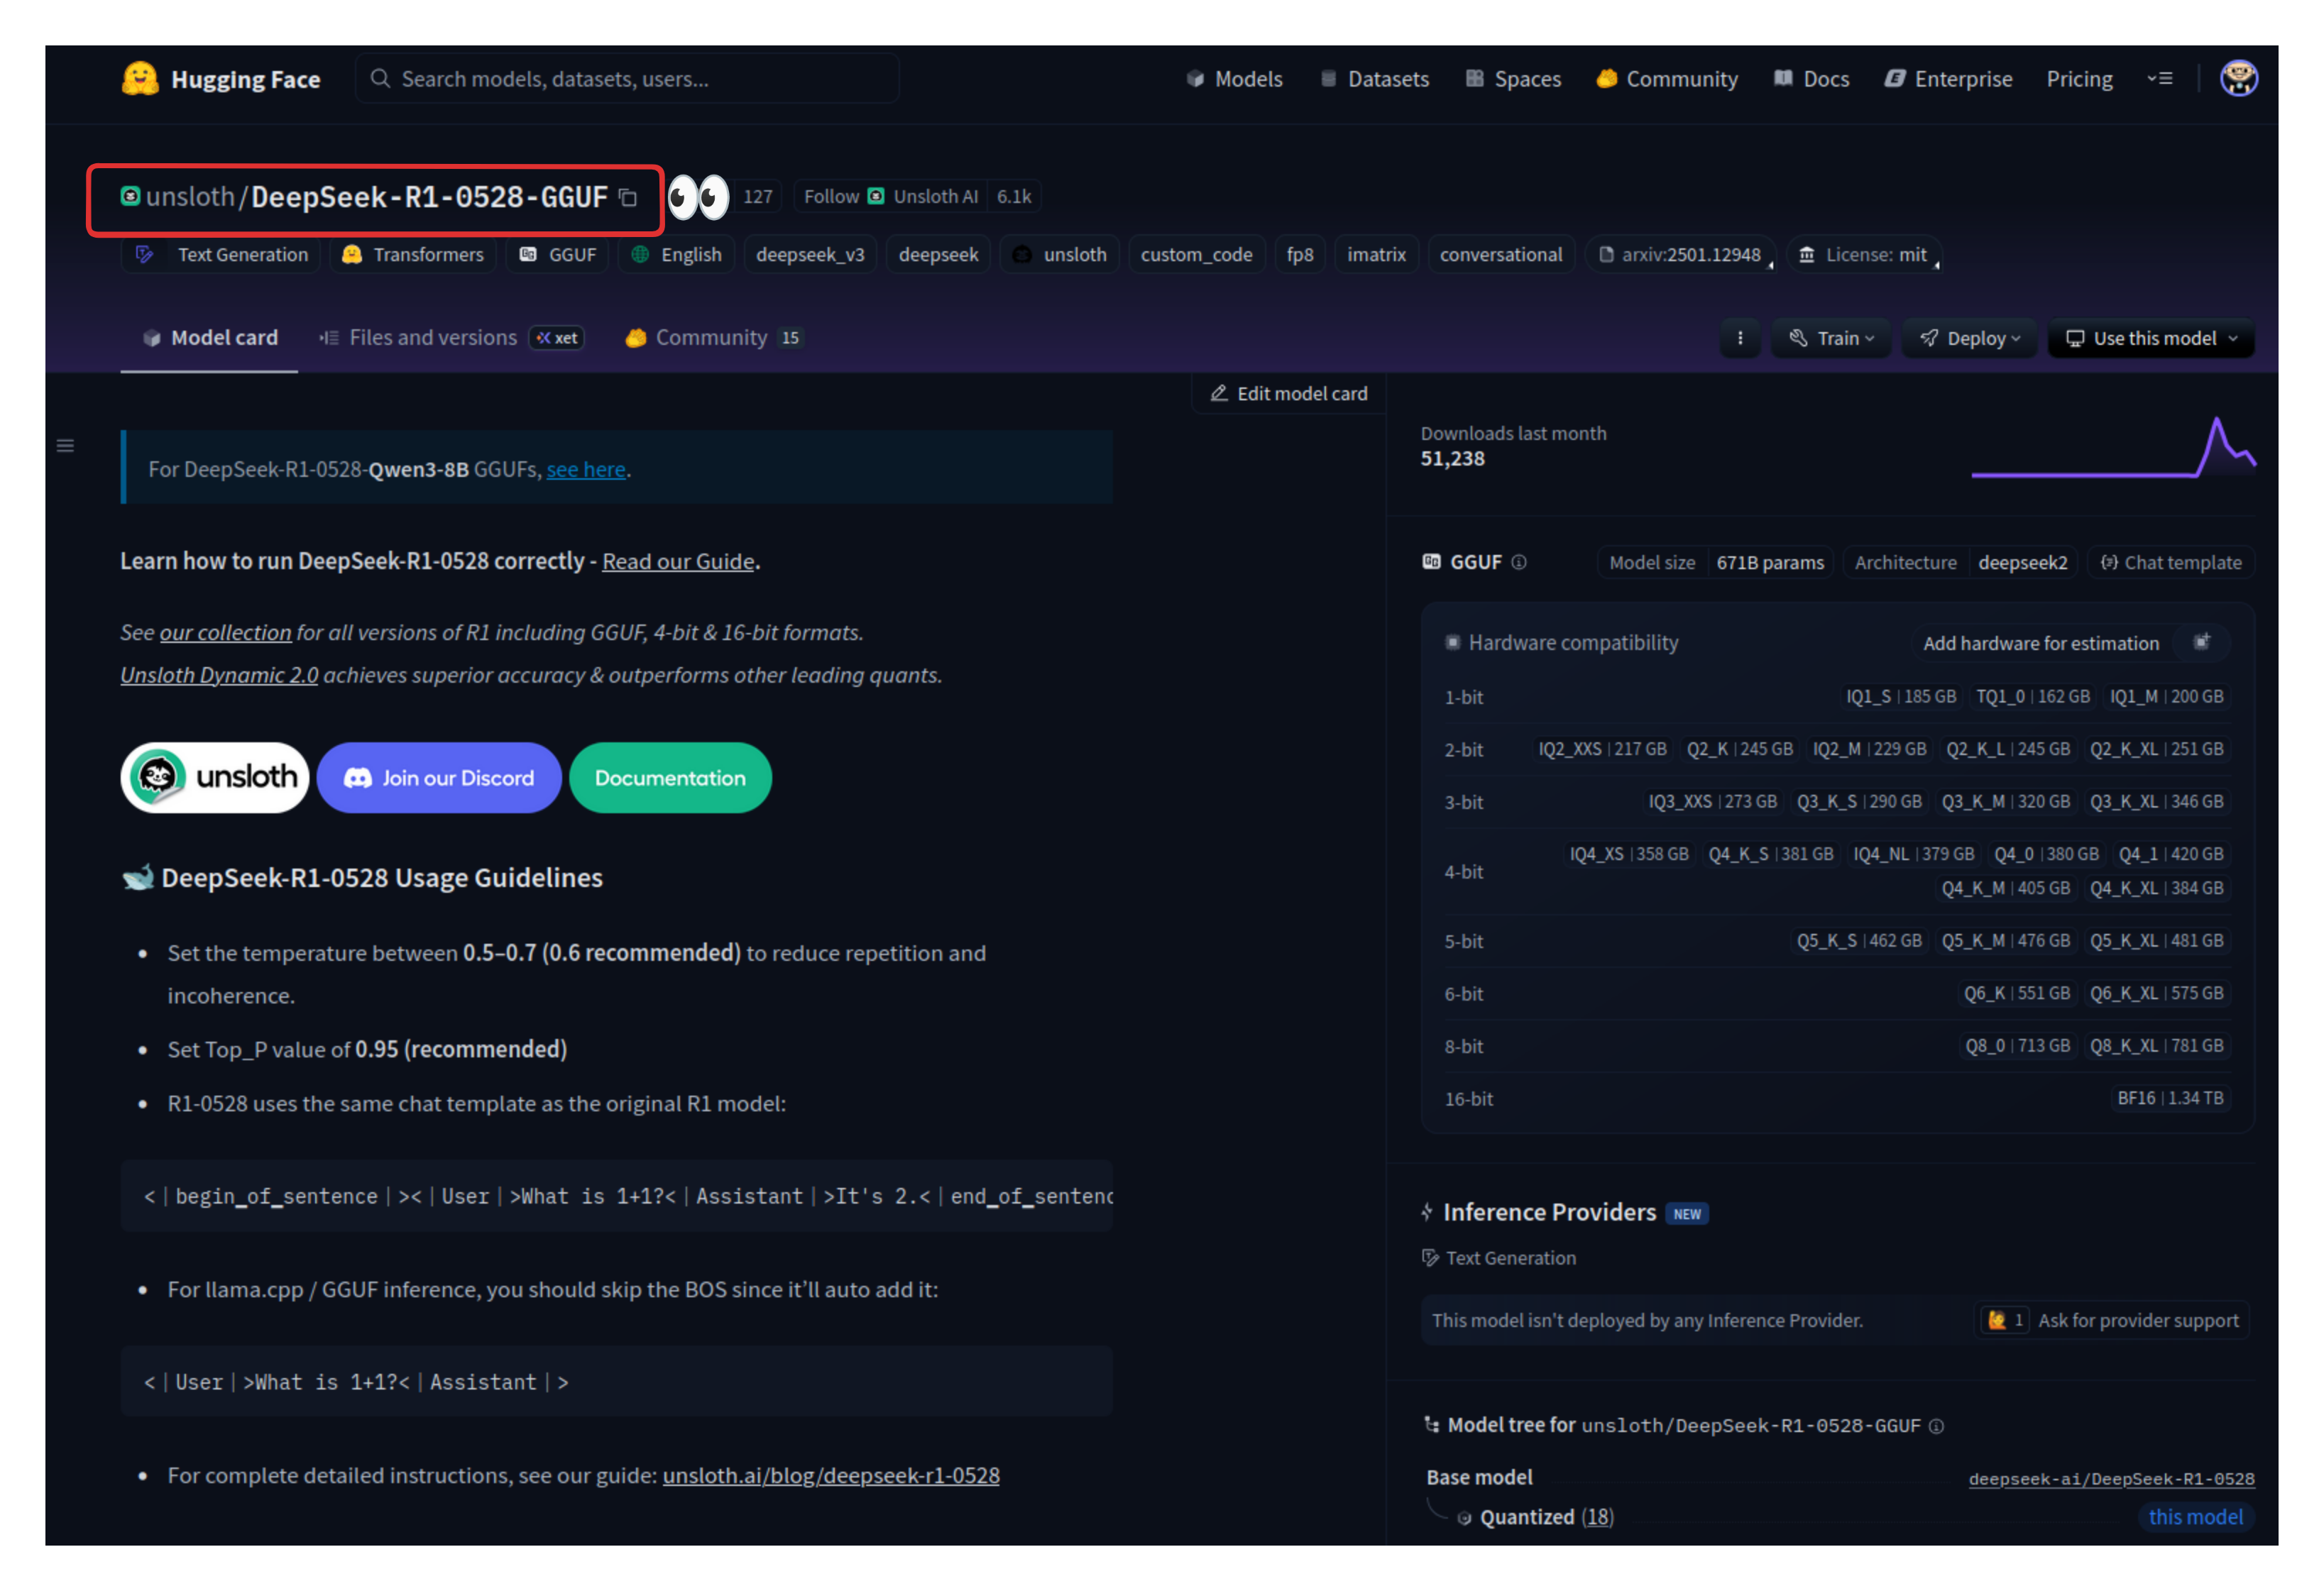
- Visit the Hugging Face Models (opens in a new tab) page.
- Find the model you want to use, make sure it is a GGUF file that fits in your computer.
- Copy the model ID (e.g., TheBloke/Mistral-7B-v0.1-GGUF)
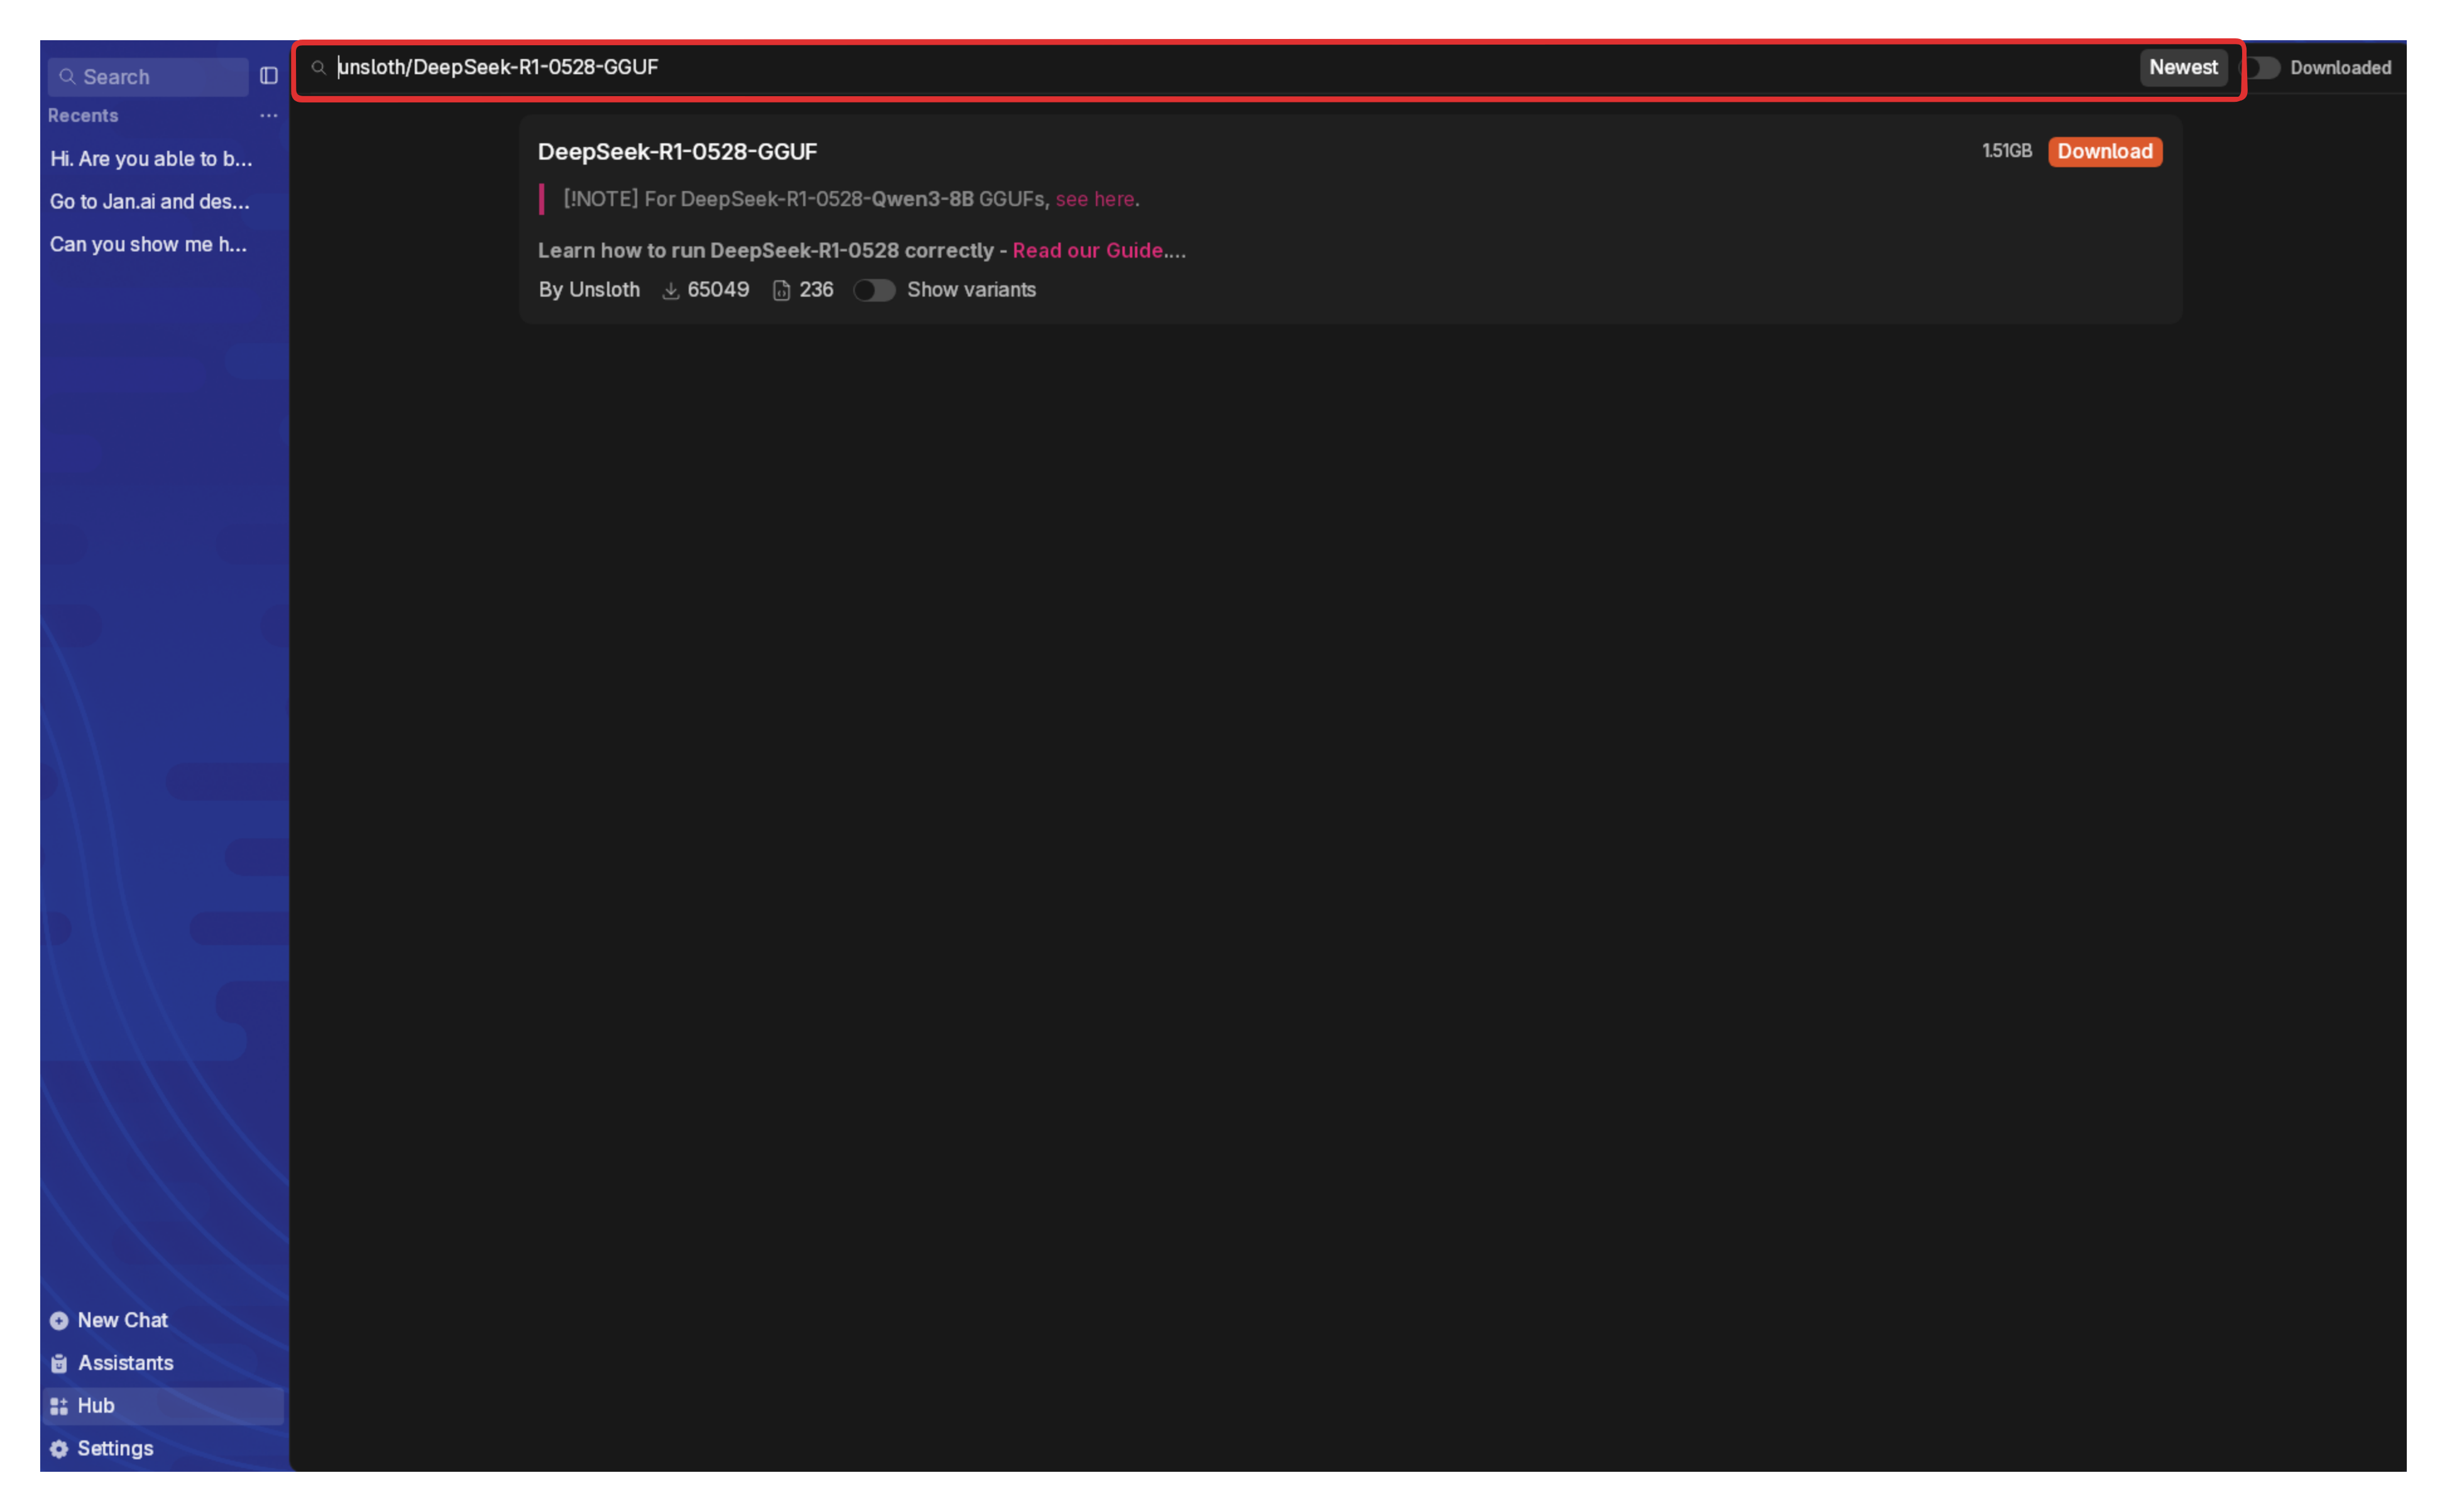
- In Jan, paste the model ID to the Search bar in Hub page
- Select your preferred quantized version to download (if the option is available)
Copy the model ID.
Paste it in Jan's Hub Search Bar.
3. Import Local Files
If you already have one or many GGUF model files on your computer:
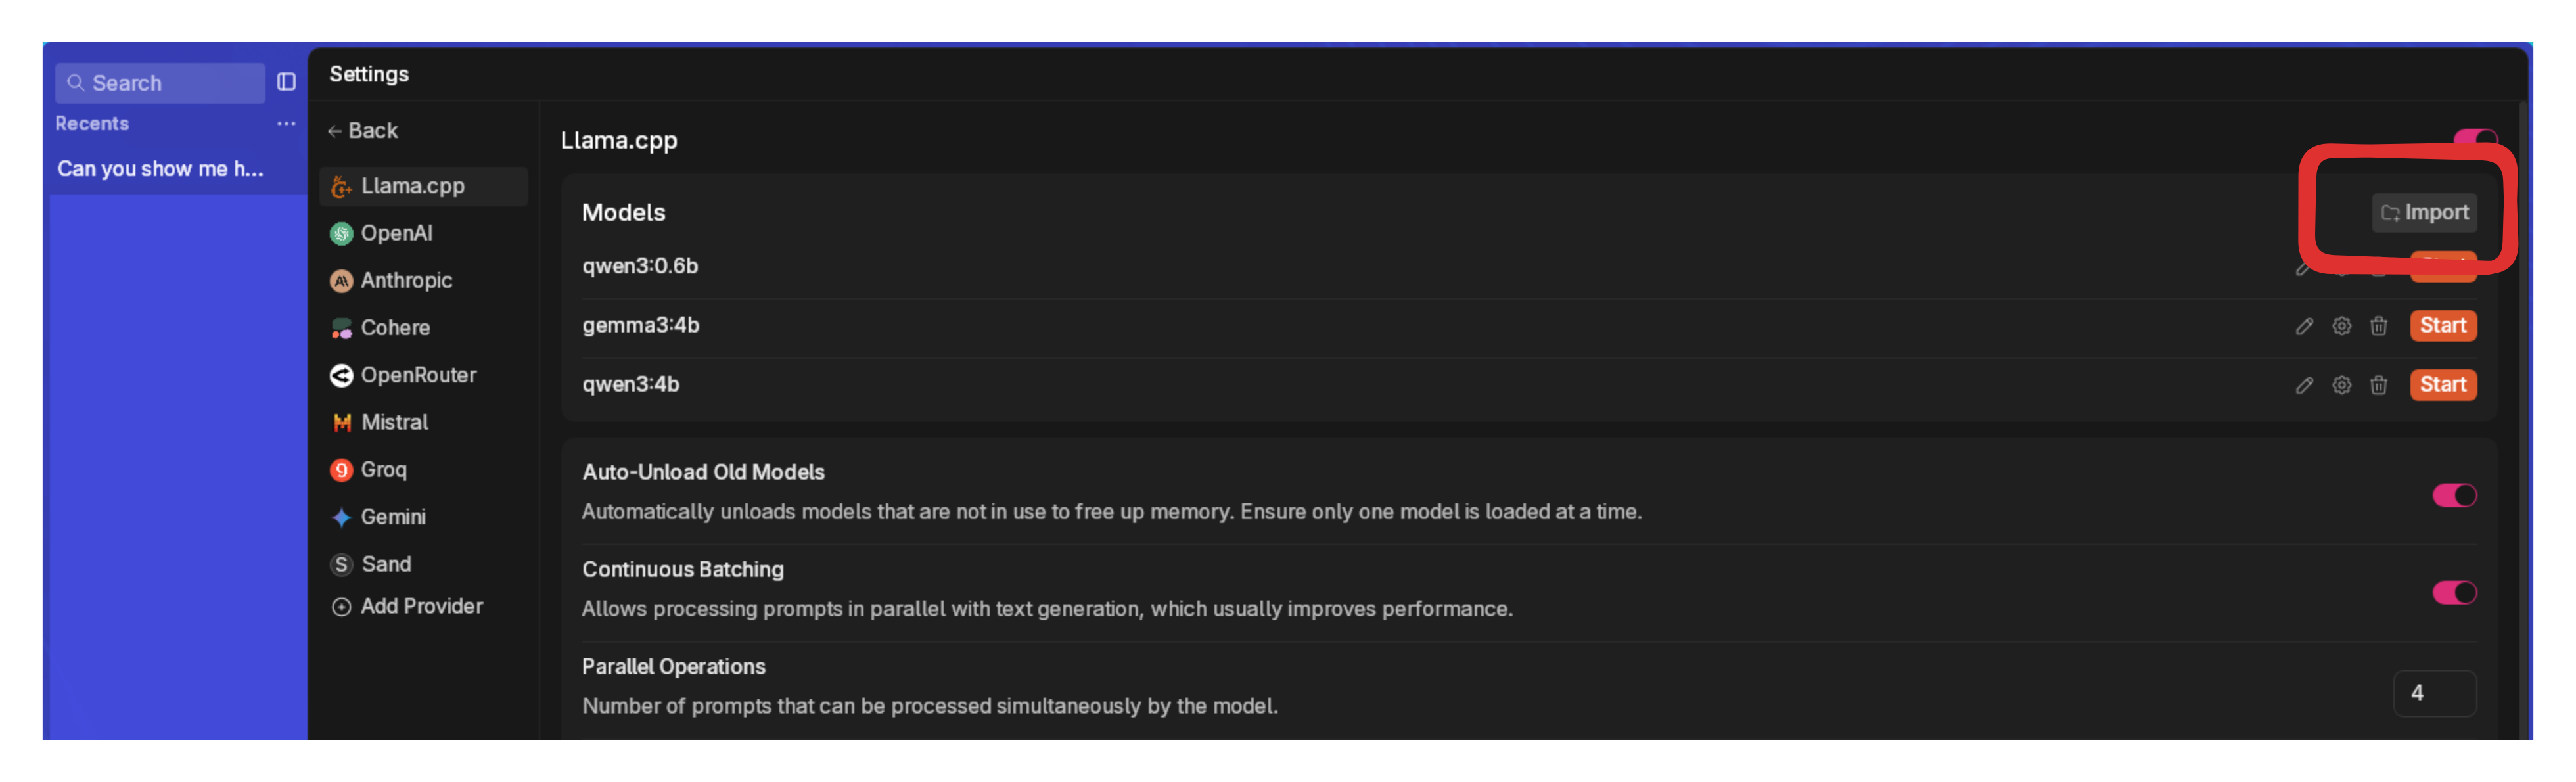
- In Jan, go to Settings > Model Providers > Llama.cpp
- Click Import and select your GGUF file(s)
- Choose how you want to import:
- Link Files: Creates symbolic links to your model files (saves space)
- Duplicate: Makes a copy of model files in Jan's directory
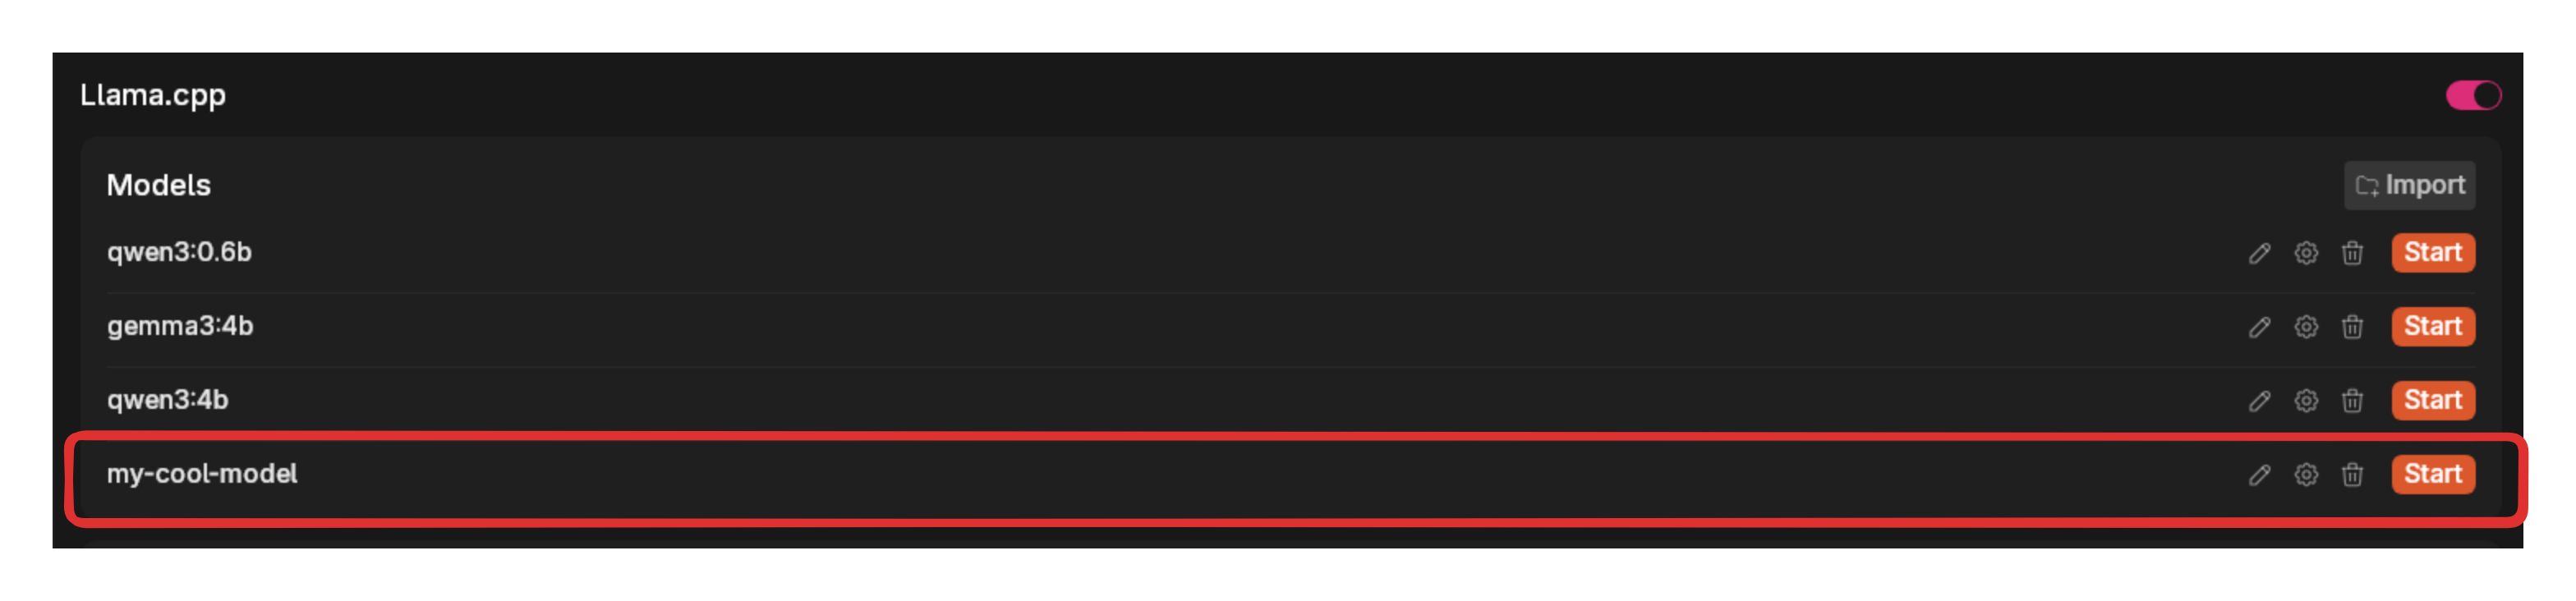
- Click Import to complete (check the Jan Data Folder section for more info)
You need to own your model configurations, use at your own risk. Misconfigurations may result in lower quality or unexpected outputs. Learn about model configurations here.

4. Manual Setup
For advanced users who want to add a specific model that is not available within the Jan Hub:
Step 1: Create Model File
- Navigate to the Jan Data Folder
- Open
modelsfolder - Create a new Folder for your model
- Add your
model.gguffile - Add your
model.jsonfile with your configuration. Here's an example with "TinyLlama Chat 1.1B Q4":
{ "sources": [ { "filename": "tinyllama-1.1b-chat-v1.0.Q4_K_M.gguf", "url": "https://huggingface.co/TheBloke/TinyLlama-1.1B-Chat-v1.0-GGUF/resolve/main/tinyllama-1.1b-chat-v1.0.Q4_K_M.gguf" } ], "id": "tinyllama-1.1b", "object": "model", "name": "TinyLlama Chat 1.1B Q4", "version": "1.0", "description": "TinyLlama is a tiny model with only 1.1B. It's a good model for less powerful computers.", "format": "gguf", "settings": { "ctx_len": 4096, "prompt_template": "<|system|>\n{system_message}<|user|>\n{prompt}<|assistant|>", "llama_model_path": "tinyllama-1.1b-chat-v1.0.Q4_K_M.gguf" }, "parameters": { "temperature": 0.7, "top_p": 0.95, "stream": true, "max_tokens": 2048, "stop": [], "frequency_penalty": 0, "presence_penalty": 0 }, "metadata": { "author": "TinyLlama", "tags": [ "Tiny", "Foundation Model" ], "size": 669000000 }, "engine": "nitro"}
Step 2: Modify Model Parameters
Key fields to configure:
- The Settings array is where you can set the path or location of your model in your computer, the context length allowed, and the chat template expected by your model.
- The Parameters are the adjustable settings that affect how your model operates or processes the data. The fields in the parameters array are typically general and can be used across different models. Here is an example of model parameters:
"parameters":{ "temperature": 0.7, "top_p": 0.95, "stream": true, "max_tokens": 4096, "frequency_penalty": 0, "presence_penalty": 0,}
Delete Models
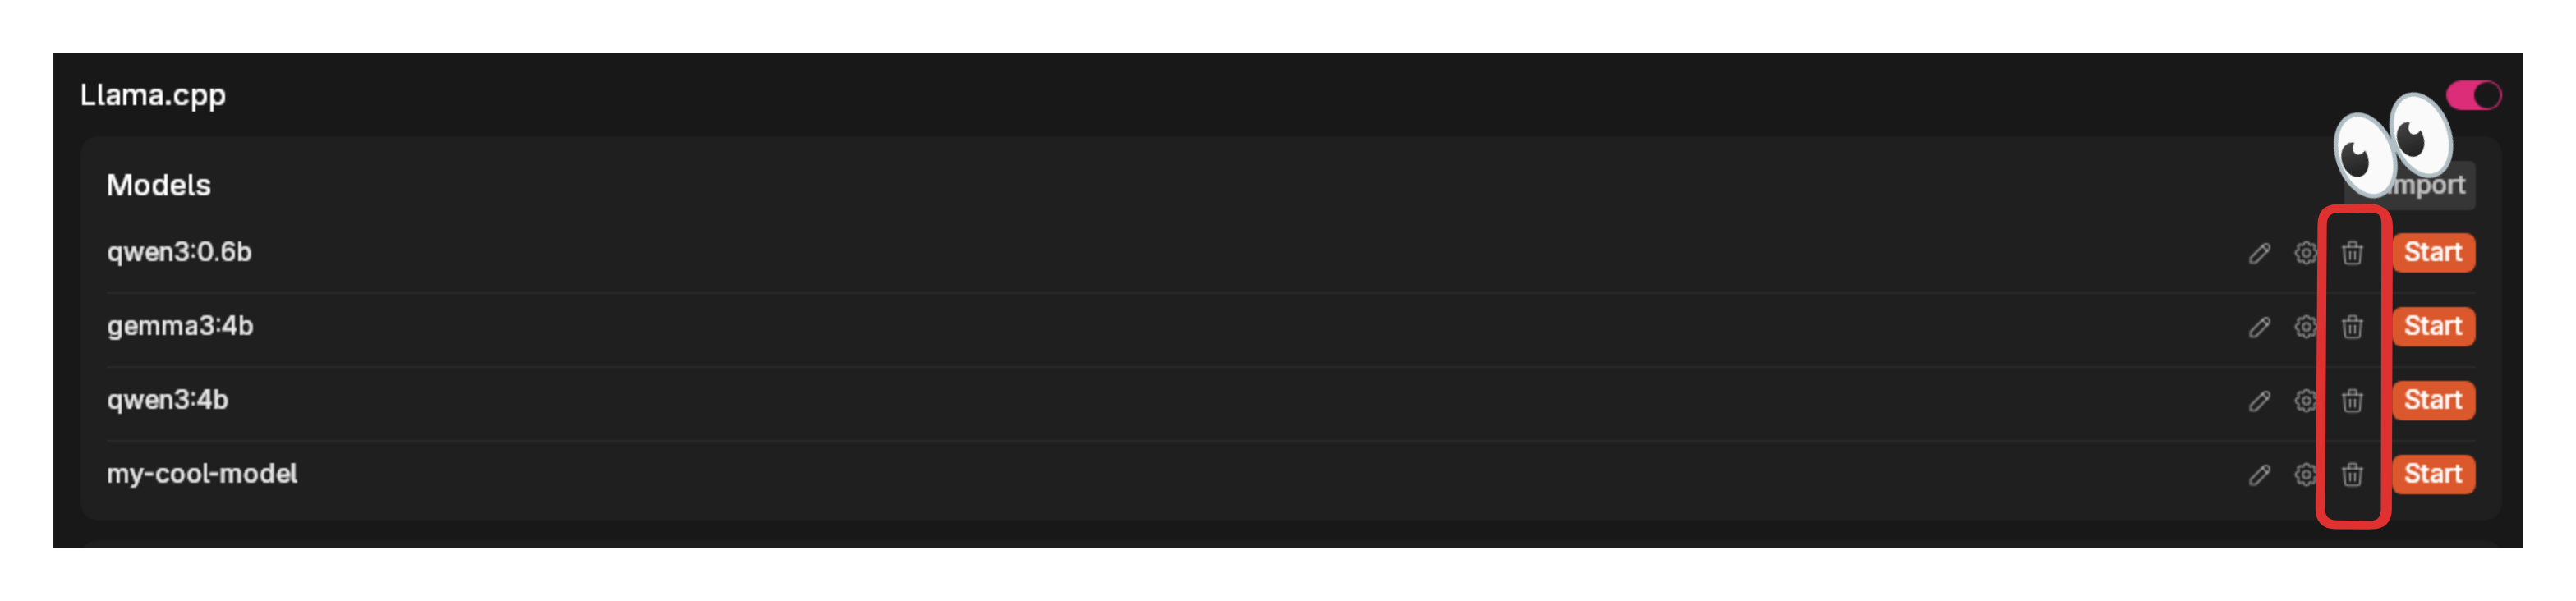
- Go to Settings > Model Providers > Llama.cpp
- Find the model you want to remove
- Select the three dots icon next to it and select Delete Model
Cloud Models
When using cloud models, be aware of any associated costs and rate limits from the providers. See detailed guide for each cloud model provider here.
Jan supports connecting to various AI cloud providers that are OpenAI API-compatible, including: OpenAI (GPT-4o, o3,...), Anthropic (Claude), Groq, Mistral, and more.
- Navigate to Settings ()
- Under Model Providers section in the left sidebar, choose your preferred provider (OpenAI, Anthropic, etc.)
- Enter your API key
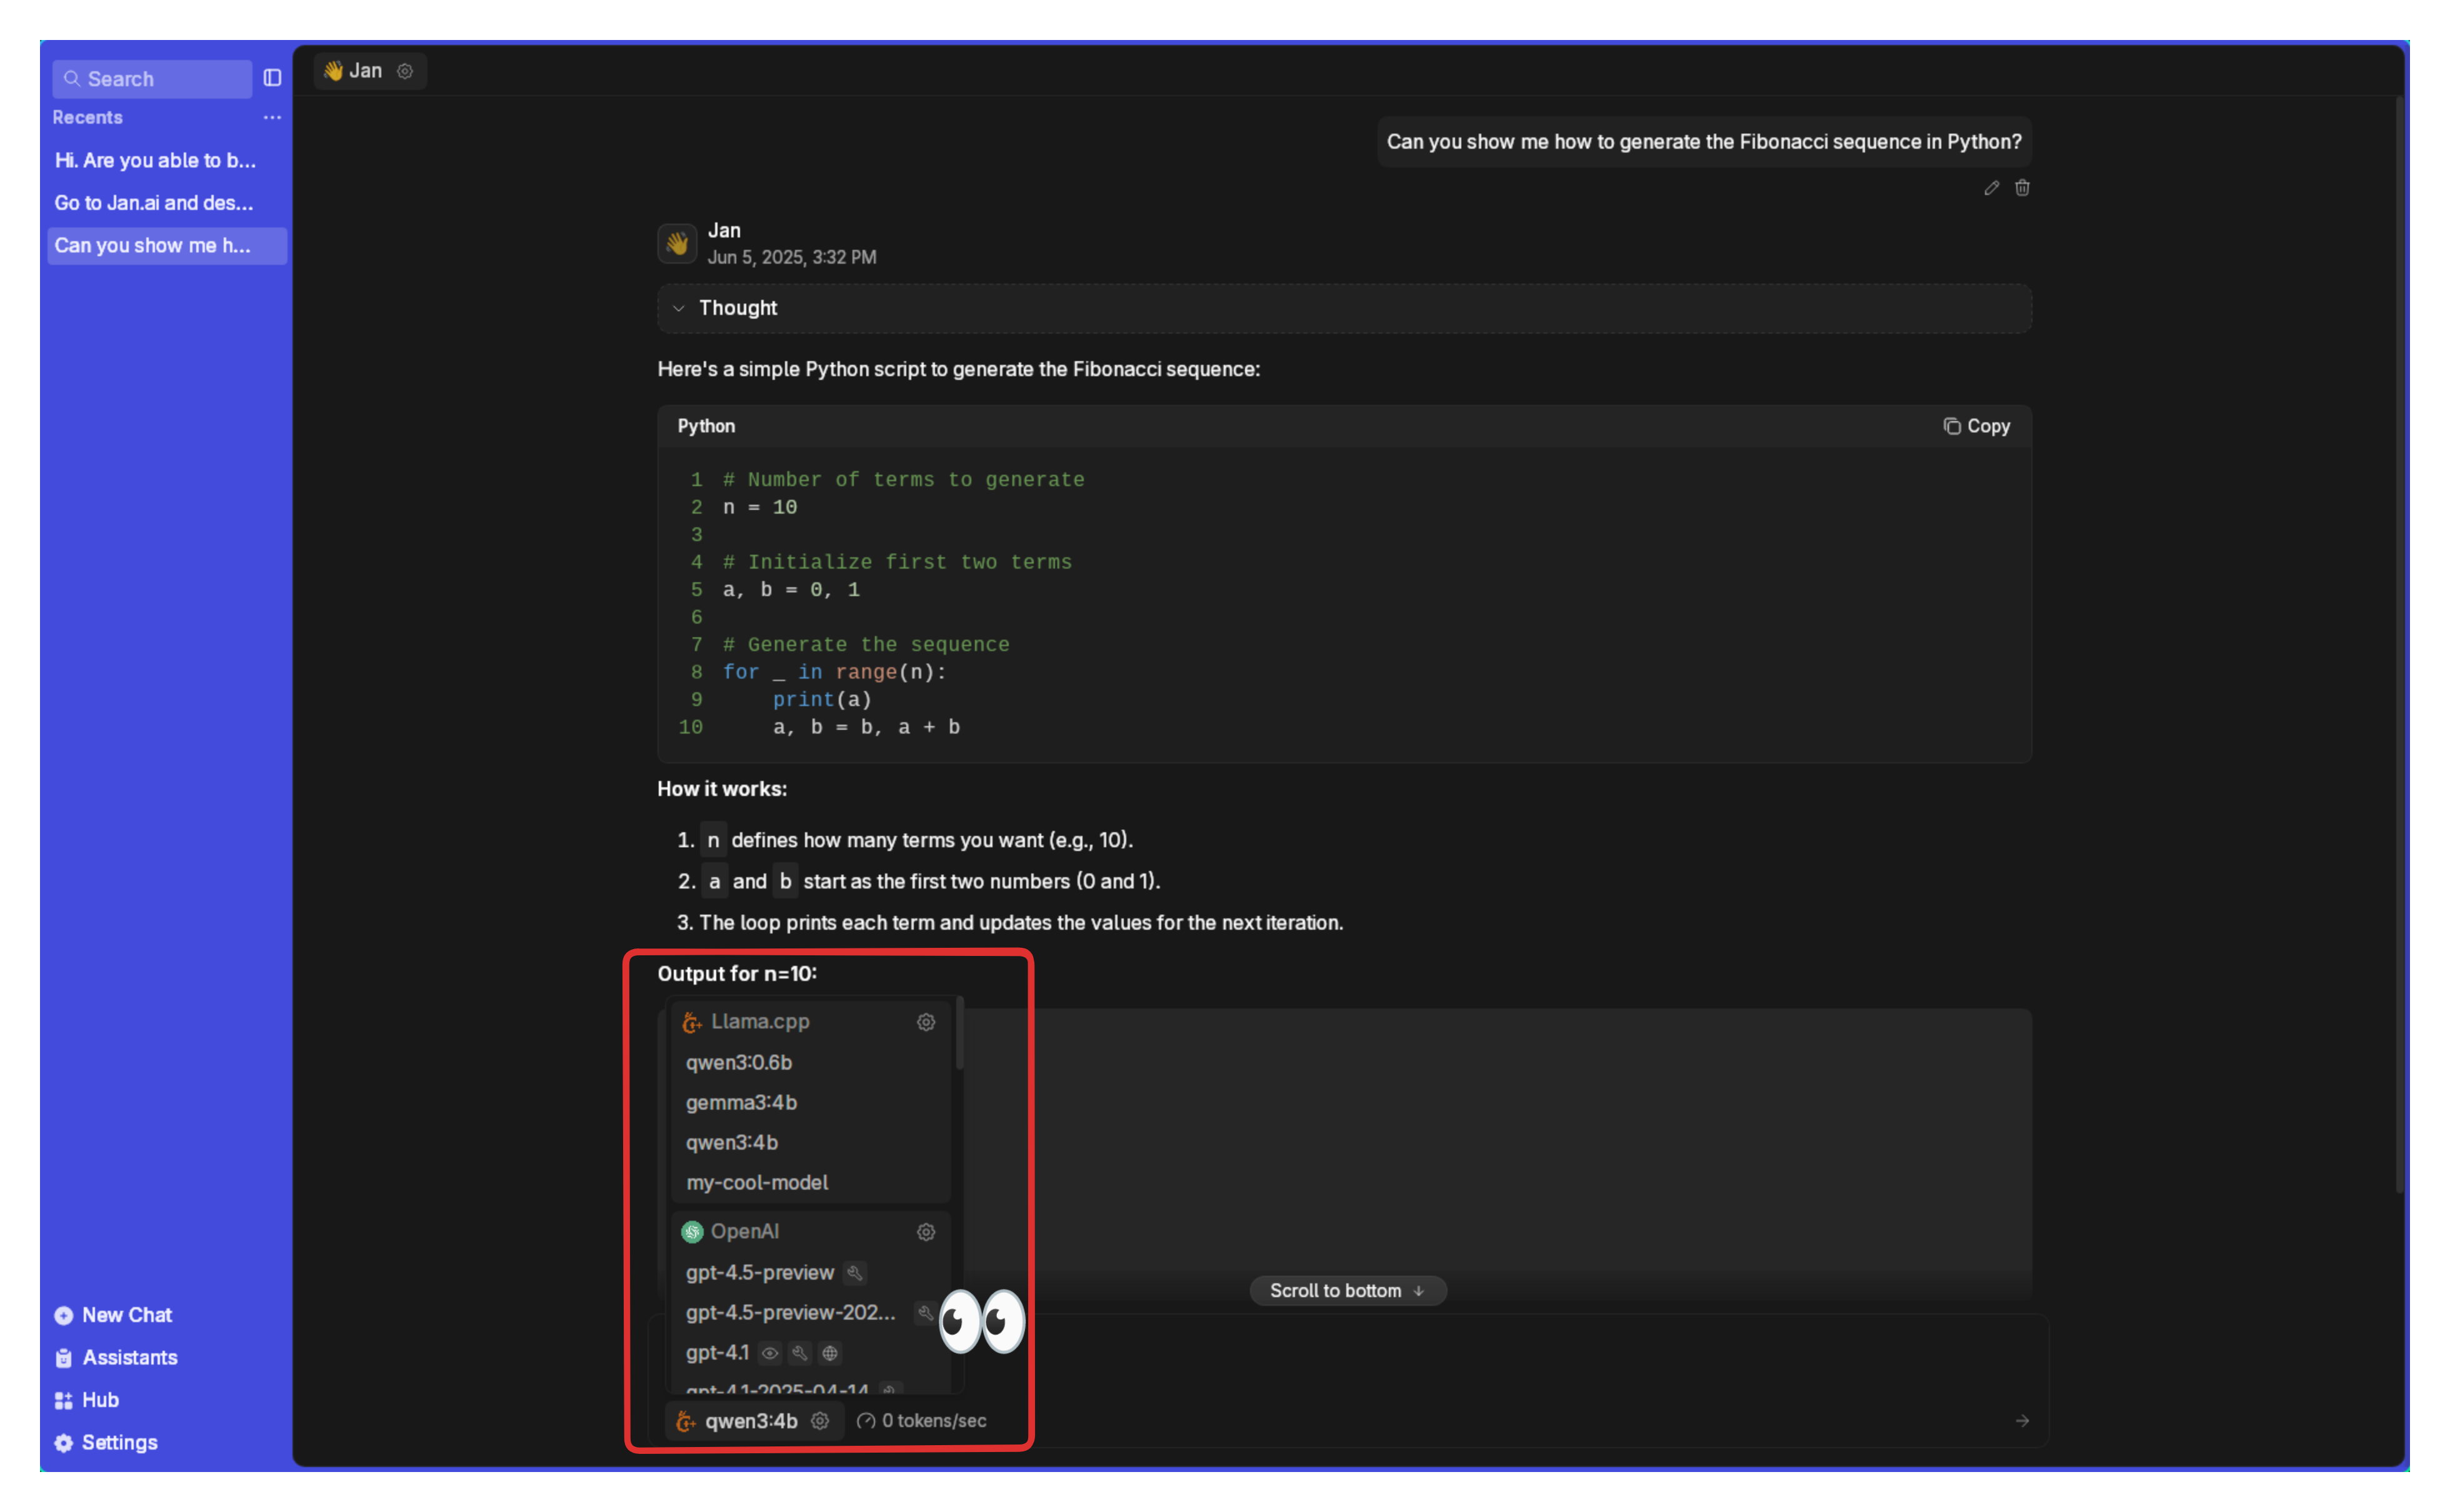
- The activated cloud models will be available in your model selector inside the Chat panel

As soon as you add your key for a model provider like Anthropic or OpenAI, you will be able to pick one of their models to chat with.