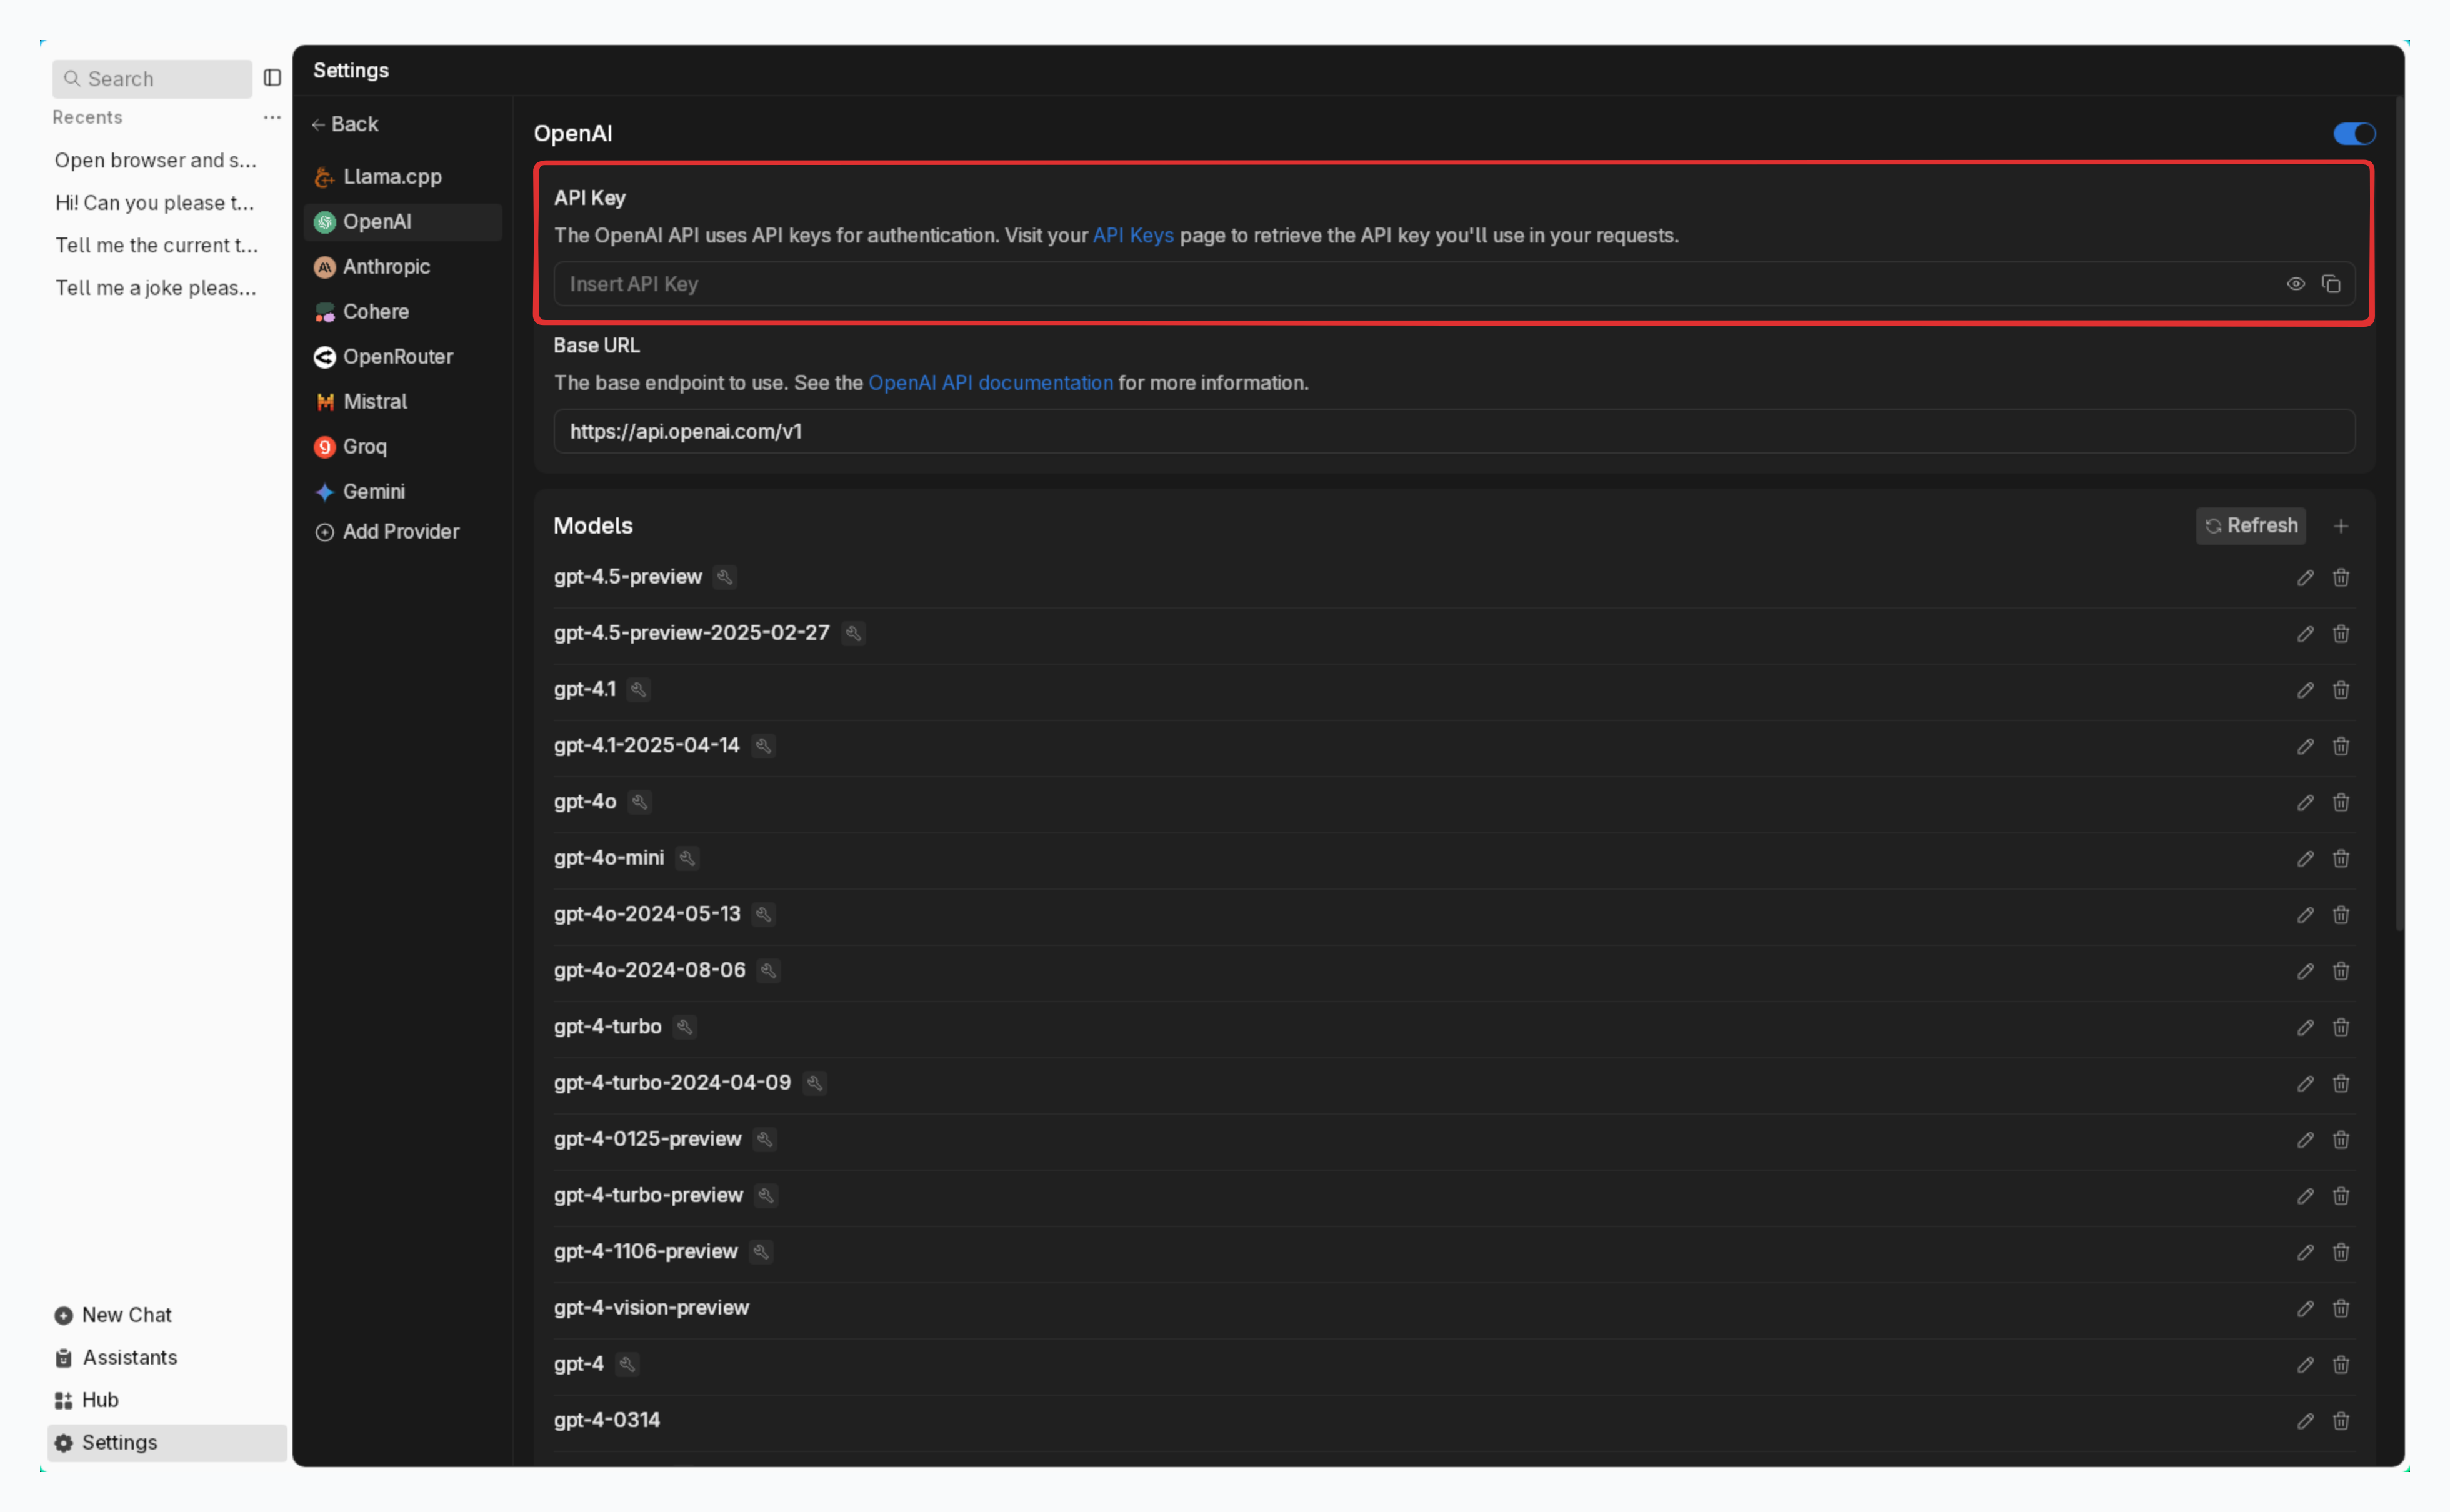
OpenAI
Jan supports most OpenAI (opens in a new tab) as well as the many OpenAI-compatible APIs out there, allowing you to use all models from OpenAI (GPT-4o, o3 and even those from Together AI, DeepSeek, Fireworks and more) through Jan's interface.
Integrate OpenAI API with Jan
Step 1: Get Your API Key
- Visit the OpenAI Platform (opens in a new tab) and sign in
- Create & copy a new API key or copy your existing one
Ensure your API key has sufficient credits
Step 2: Configure Jan
- Navigate to the Settings page ()
- Under Remote Engines, select OpenAI
- Insert your API Key

Step 3: Start Using OpenAI's Models
In any existing Threads or create a new one Select an OpenAI model from model selector Start chatting
Available OpenAI Models
Jan automatically includes popular OpenAI models. In case you want to use a specific model that you cannot find in Jan, follow instructions in Add Cloud Models:
- See list of available models in OpenAI Platform (opens in a new tab).
- The id property must match the model name in the list. For example, if you want to use the GPT-4.5 (opens in a new tab), you must set the id property to respective one.
Troubleshooting
Common issues and solutions:
- API Key Issues
- Verify your API key is correct and not expired
- Check if you have billing set up on your OpenAI account
- Ensure you have access to the model you're trying to use
- Connection Problems
- Check your internet connection
- Verify OpenAI's system status (opens in a new tab)
- Look for error messages in Jan's logs
- Model Unavailable
- Confirm your API key has access to the model
- Check if you're using the correct model ID
- Verify your OpenAI account has the necessary permissions
Need more help? Join our Discord community (opens in a new tab) or check the OpenAI documentation (opens in a new tab).