Local API Server
Jan provides a built-in, OpenAI-compatible API server that runs entirely on your computer, powered by llama.cpp. Use it as a drop-in replacement for cloud APIs to build private, offline-capable AI applications.
Quick Start
Start the Server
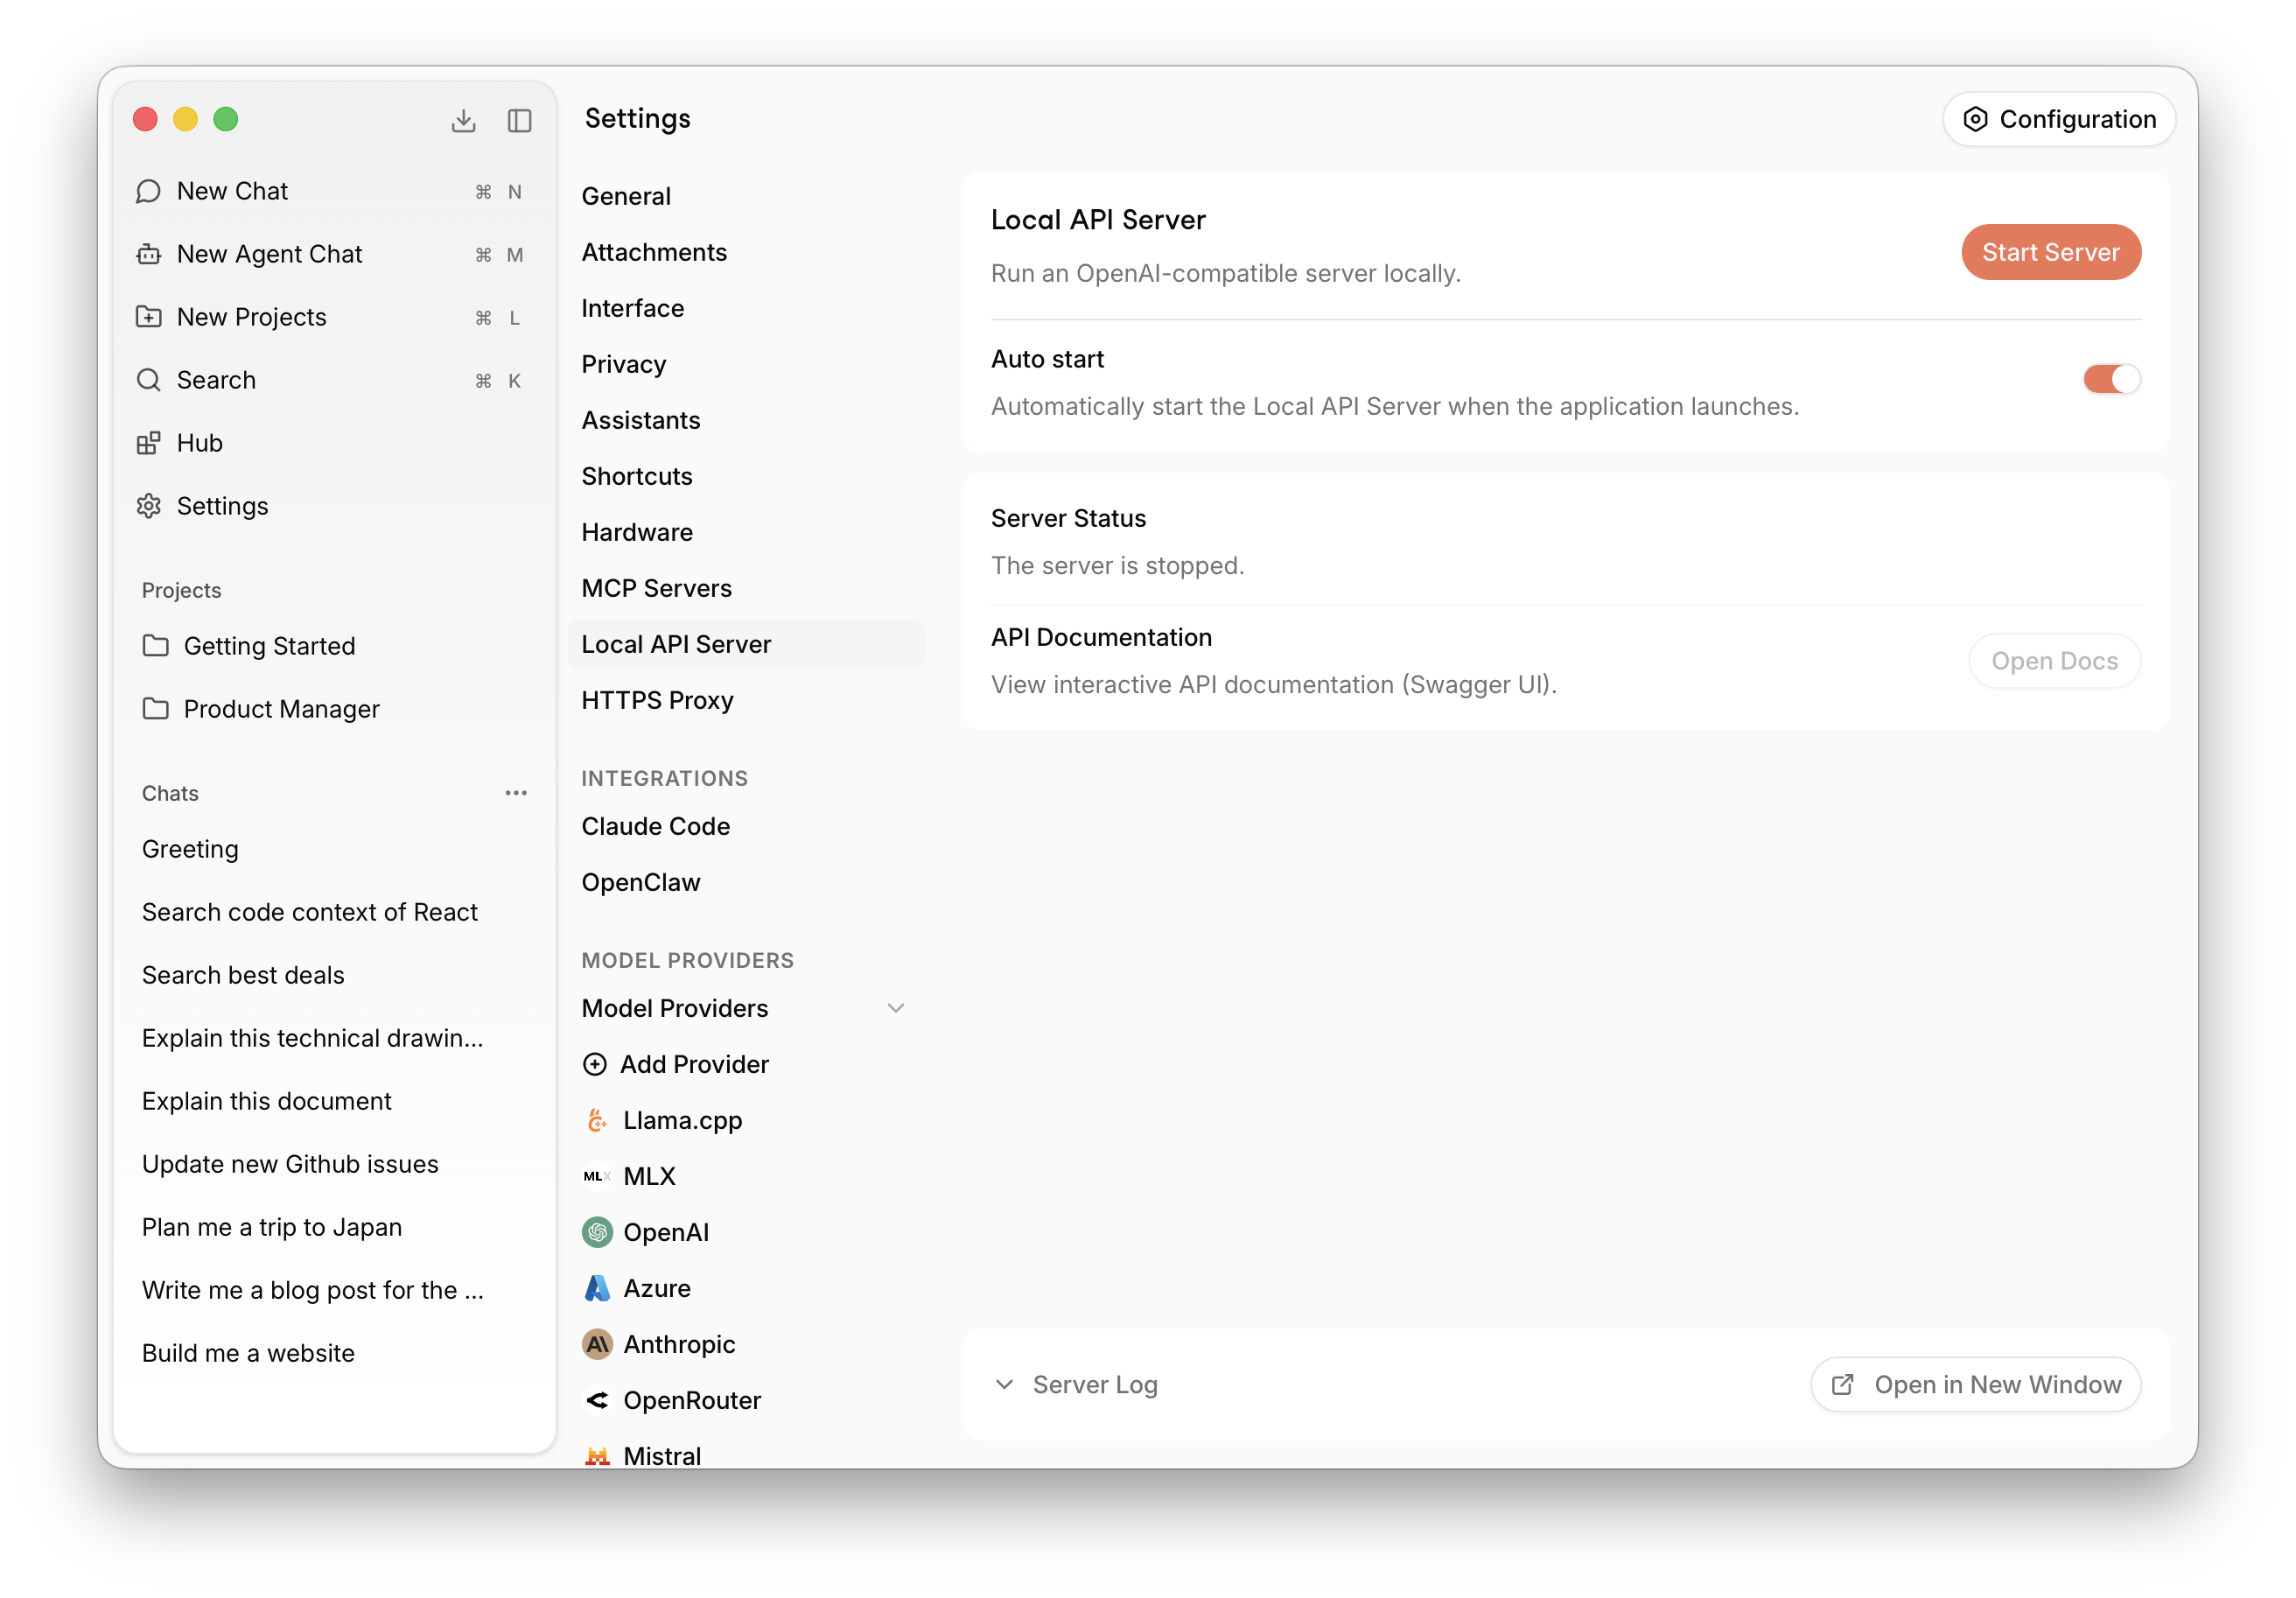
- Navigate to Settings > Local API Server.
- Click Start Server.
The server is ready when the logs show JAN API listening at http://127.0.0.1:1337.
Test with cURL
Open a terminal and make a request. Replace YOUR_MODEL_ID with the ID of an available model in Jan.
curl http://127.0.0.1:1337/v1/chat/completions \ -H "Content-Type: application/json" \ -H "Authorization: Bearer secret-key-123" \ -d '{ "model": "YOUR_MODEL_ID", "messages": [{"role": "user", "content": "Tell me a joke."}] }'
Server Configuration
These settings control the network accessibility and basic behavior of your local server. Access them via the Configuration button in the top right.
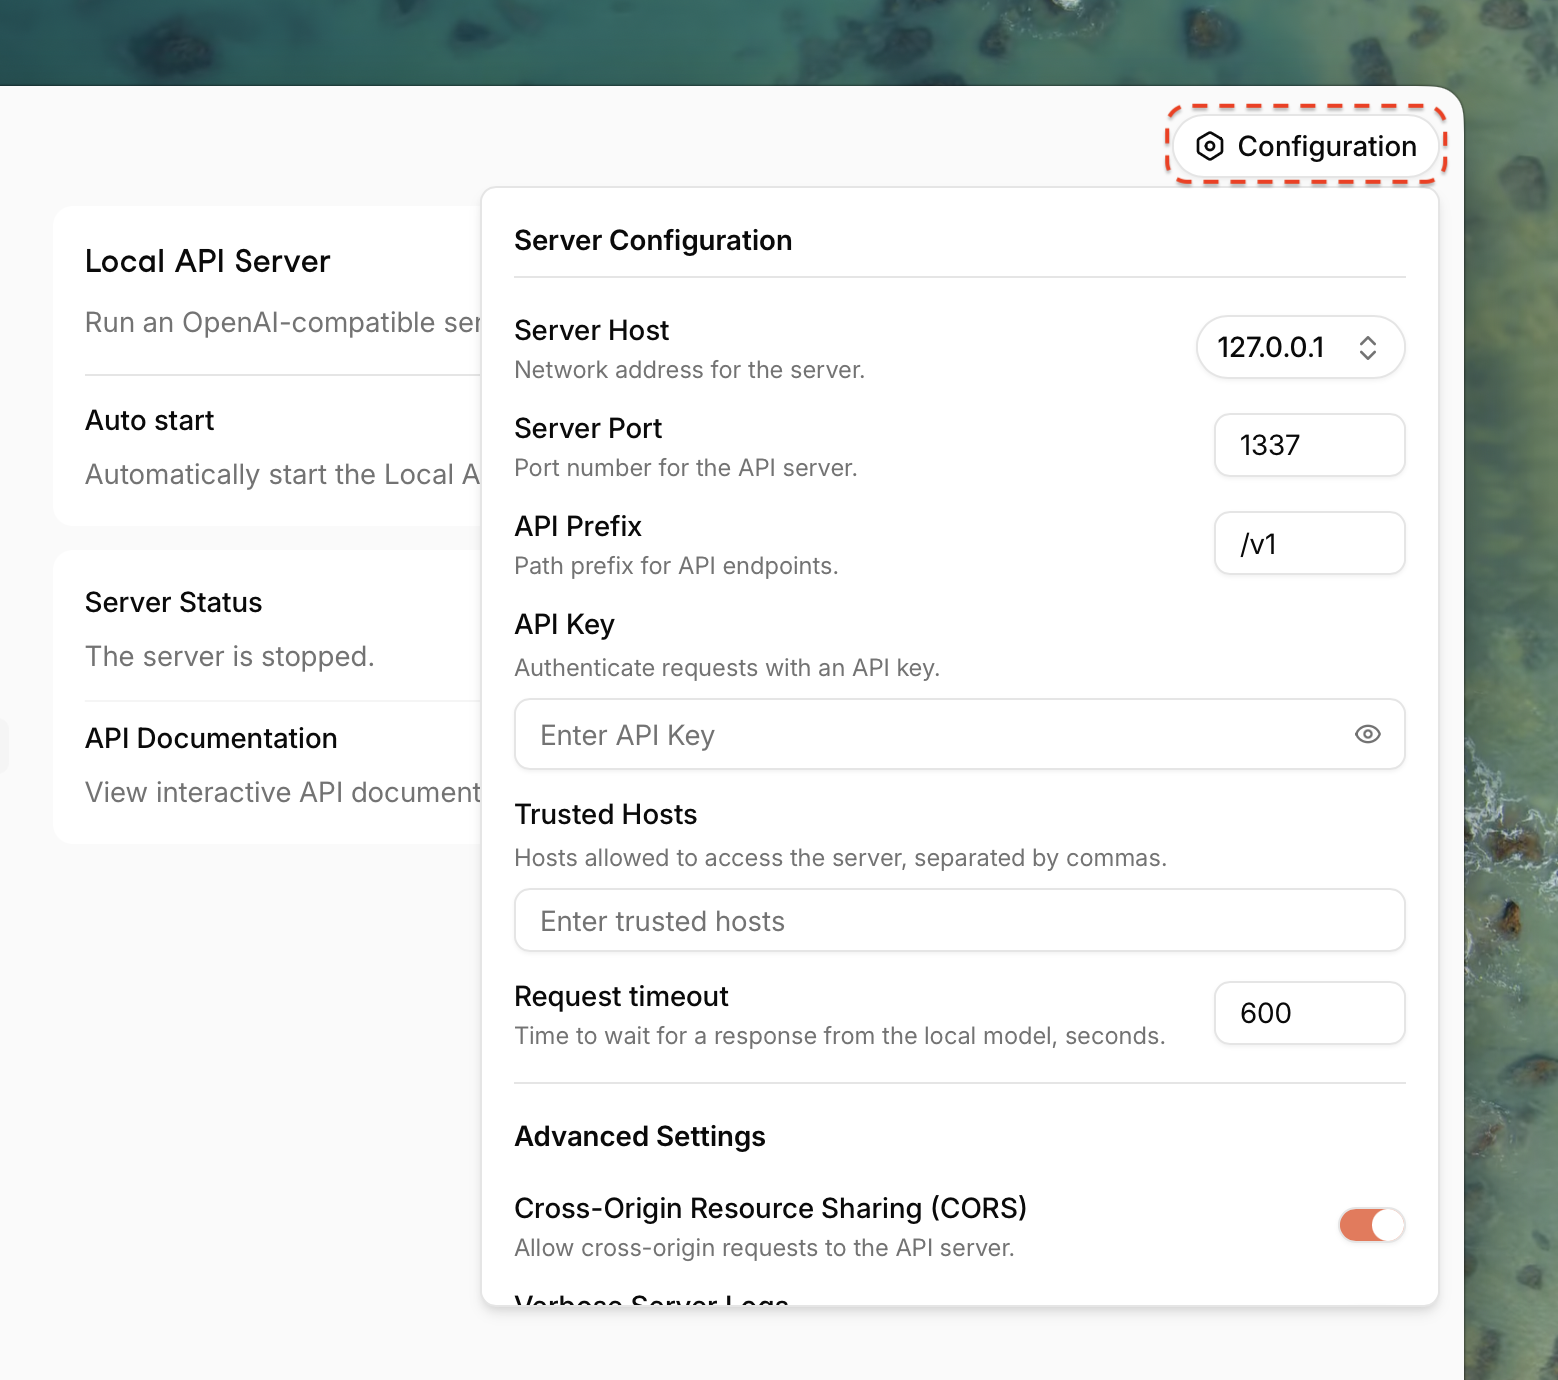
Server Host
The network address the server listens on.
127.0.0.1(Default): The server is only accessible from your own computer. This is the most secure option for personal use.0.0.0.0: The server is accessible from other devices on your local network (e.g., your phone or another computer). Use this with caution.
Server Port
The port number for the API server.
1337(Default): A common alternative port.- You can change this to any available port number (e.g.,
8000).
API Prefix
The base path for all API endpoints.
/v1(Default): Follows OpenAI's convention. The chat completions endpoint would behttp://127.0.0.1:1337/v1/chat/completions.- You can change this or leave it empty if desired.
API Key
A mandatory secret key to authenticate requests.
- You must set a key. It can be any string (e.g.,
a-secure-password). - All API requests must include this key in the
Authorization: Bearer YOUR_API_KEYheader.
Trusted Hosts
A comma-separated list of hostnames allowed to access the server. This provides an additional layer of security when the server is exposed on your network.
Advanced Settings
Cross-Origin Resource Sharing (CORS)
- (Enabled by default) Allows web applications (like a custom web UI you are building) running on different domains to make requests to the API server.
- Disable this if your API will only be accessed by non-browser-based applications (e.g., scripts, command-line tools) for slightly improved security.
Verbose Server Logs
- (Enabled by default) Provides detailed, real-time logs of all incoming requests, responses, and server activity.
- This is extremely useful for debugging application behavior and understanding exactly what is being sent to the models.
Troubleshooting
Ensure Verbose Server Logs are enabled to get detailed error messages in the "Server Logs" view.
- Connection Refused: The server is not running, or your application is pointing to the wrong host or port.
- 401 Unauthorized: Your API Key is missing from the
Authorizationheader or is incorrect. - 404 Not Found:
- The
modelID in your request body does not match an available model in Jan. - Your request URL is incorrect (check the API Prefix).
- The
- CORS Error (in a web browser): Ensure the CORS toggle is enabled in Jan's settings.