Quickstart
To quickly get started, follow the steps below:
Step 1: Install Jan
You can run Jan either on your desktop using the Jan desktop app or on a server by installing the Jan server. To get started, check out these pages:
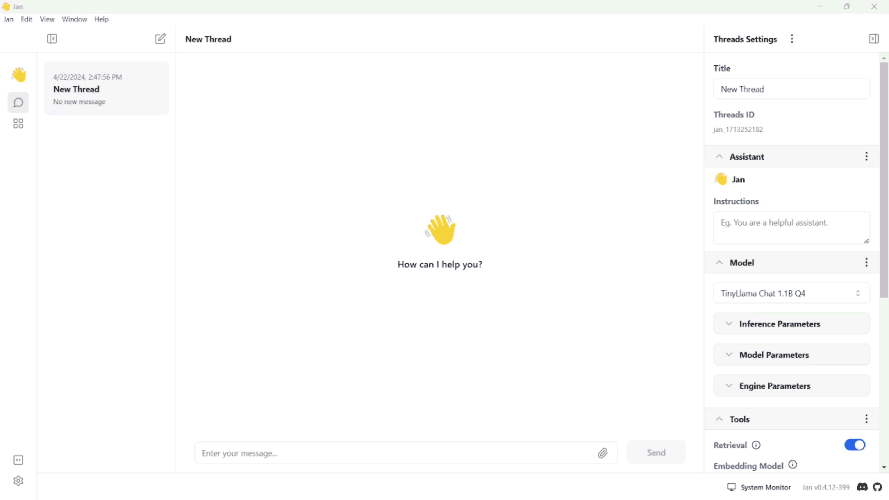
Once you have installed Jan, you should see the Jan application as shown below without any local model installed:

Step 2: Turn on the GPU Acceleration (Optional)
If you have a graphics card, boost model performance by enabling GPU acceleration:
- Open Jan application.
- Go to Settings -> Advanced Settings -> GPU Acceleration.
- Click the Slider and choose your preferred GPU.
- A success notification saying Successfully turned on GPU acceleration will appear when GPU acceleration is activated.
Ensure you have installed your GPU driver. Please see Desktop for more information on activating the GPU acceleration.
Step 3: Download a Model
Jan offers various local AI models tailored to different needs, all ready for download directly to your device:
- Go to the Hub.
- Select the models that you would like to install. To see model details, click the dropdown button.
- You can also paste the Hugging Face model's ID or URL in the search bar.
Ensure you select the appropriate model size by balancing performance, cost, and resource considerations in line with your task's specific requirements and hardware specifications.
- Click the Download button.
- Go to the Thread tab.
- Click the Model dropdown button.
- Choose the downloaded model, either Local or Remote.
- Adjust the configurations as needed.
Please see Model Parameters for detailed model configuration.

Step 4: Customize the Assistant Instruction
Customize Jan's assistant behavior by specifying queries, commands, or requests in the Assistant Instructions field to get the most responses from your assistant. To customize, follow the steps below:
- On the Thread section, navigate to the right panel.
- Select the Assistant dropdown menu.
- Provide a specific guideline under the Instructions field.

Step 5: Start Thread
Once you have downloaded a model and customized your assistant instruction, you can start chatting with the model.
Step 6: Connect to a Remote API
Jan also offers access to remote models hosted on external servers. You can link up with any Remote AI APIs compatible with OpenAI. Jan comes with numerous extensions that facilitate connections to various remote AI APIs. To explore and connect to Remote APIs, follow these steps:
- Click the Gear Icon (⚙️) on the bottom left of your screen.
- Under the Settings screen, click the Extensions.
- Ensure that you have installed the extensions.
- Fill in the API URL and Keys in the OpenAI Inference Engine section.
What's Next?
Now that Jan is up and running, explore further:
- Learn how to download and manage your models.
- Customize Jan's application settings according to your preferences.
- Discover supported integrations to expand Jan's capabilities.
- Find out how to use Jan as a client and a server.